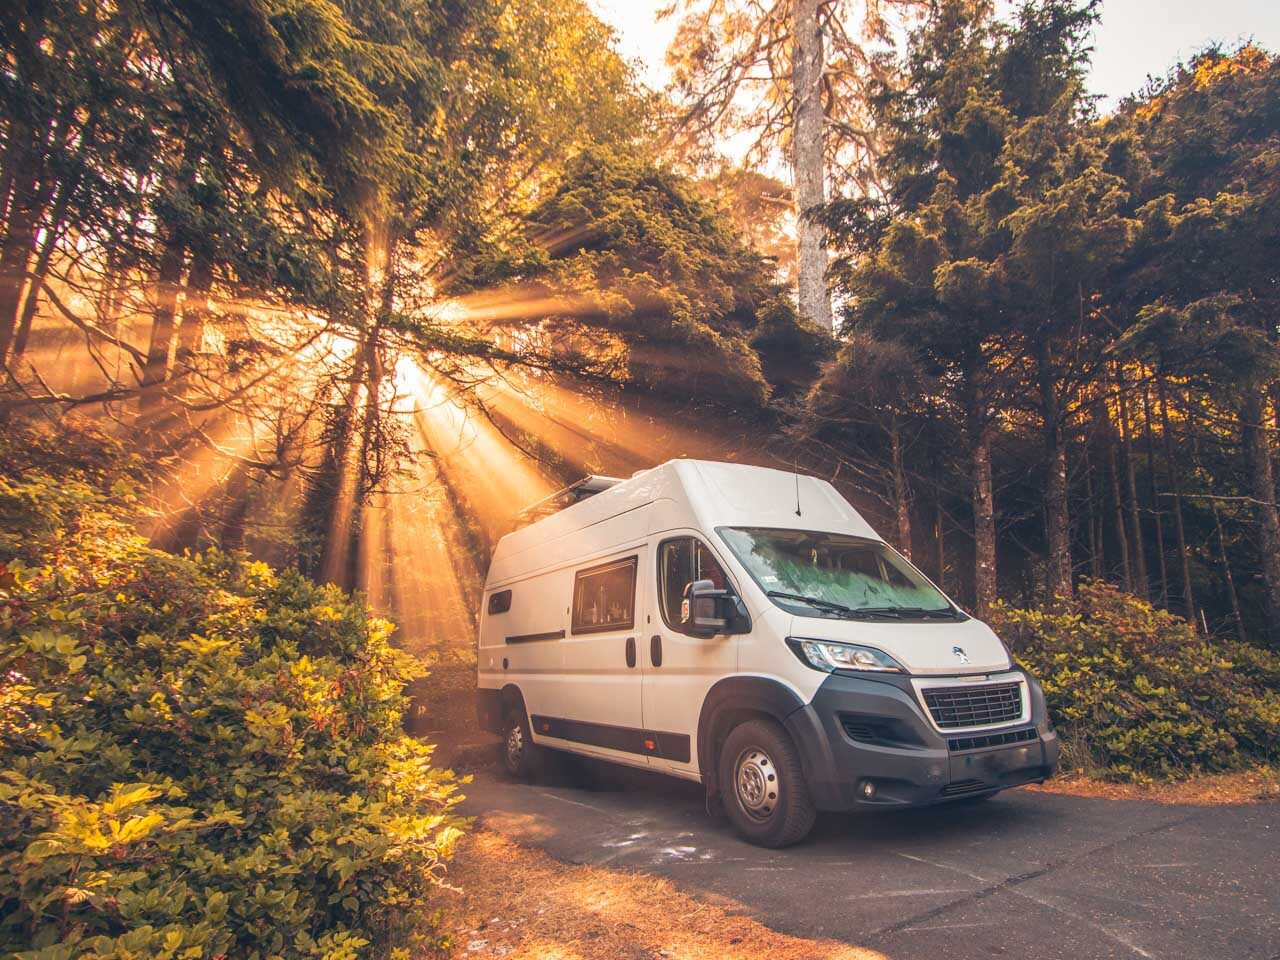
So you’re thinking about jumping into the van build van life movement? Awesome! I remember how overwhelming it felt when I first started researching my own conversion.
There’s so much to learn, but don’t worry – I’m going to break down the answers to the 20 most common questions people ask before starting their van build.
My partner and I completed our conversion last year, and we learned a ton along the way – both what to do and definitely what NOT to do! I wish I’d had a guide like this when we started, so I hope it helps make your journey a bit smoother.
Let’s dive right into the questions that are probably keeping you up at night…
1. How much money will van build actually cost me?
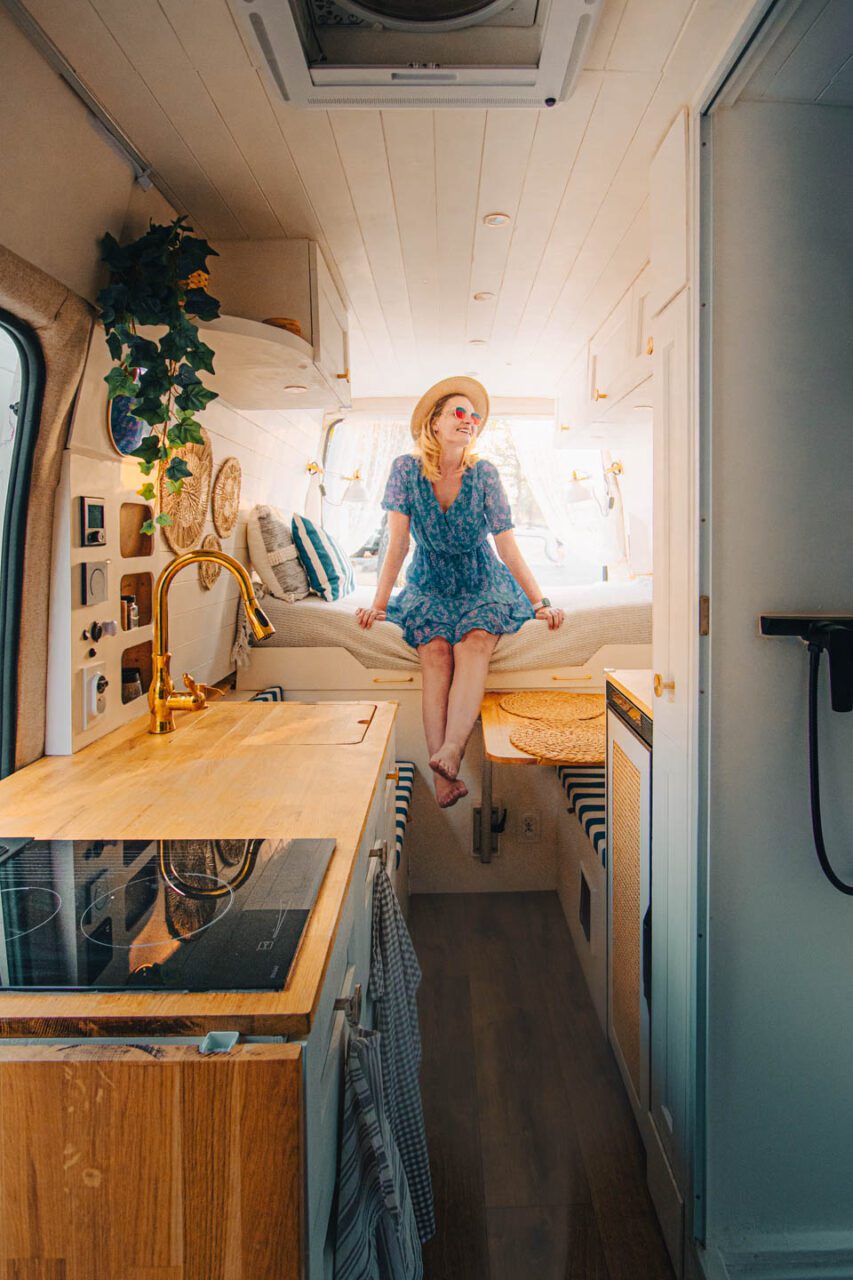
Let’s talk real numbers. Our van conversion set us back about 16,000 EUR ($17,500), and that’s not including the van itself.
Here’s how our budget broke down:
- Water, gas and heating: 4,500 EUR ($5,000) – this was one of our bigger expenses because we wanted a quality system
- Electrical setup and electronics: 3,000 EUR ($3,300) – don’t skimp here!
- Insulation, windows, fans: 2,500 EUR ($2,800) – crucial for comfort
- Interior cabinets and furniture: 2,000 EUR ($2,200) – we built these ourselves to save money
- Kitchen and bathroom: 3,000 EUR ($3,300) – we splurged on a nice countertop
Your costs might look different depending on what features matter most to you. Some friends of ours spent way less by using reclaimed materials, while others went all out with fancy appliances.
The key is making a budget before you start and (trying to) stick to it!
2. How long will the conversion take?
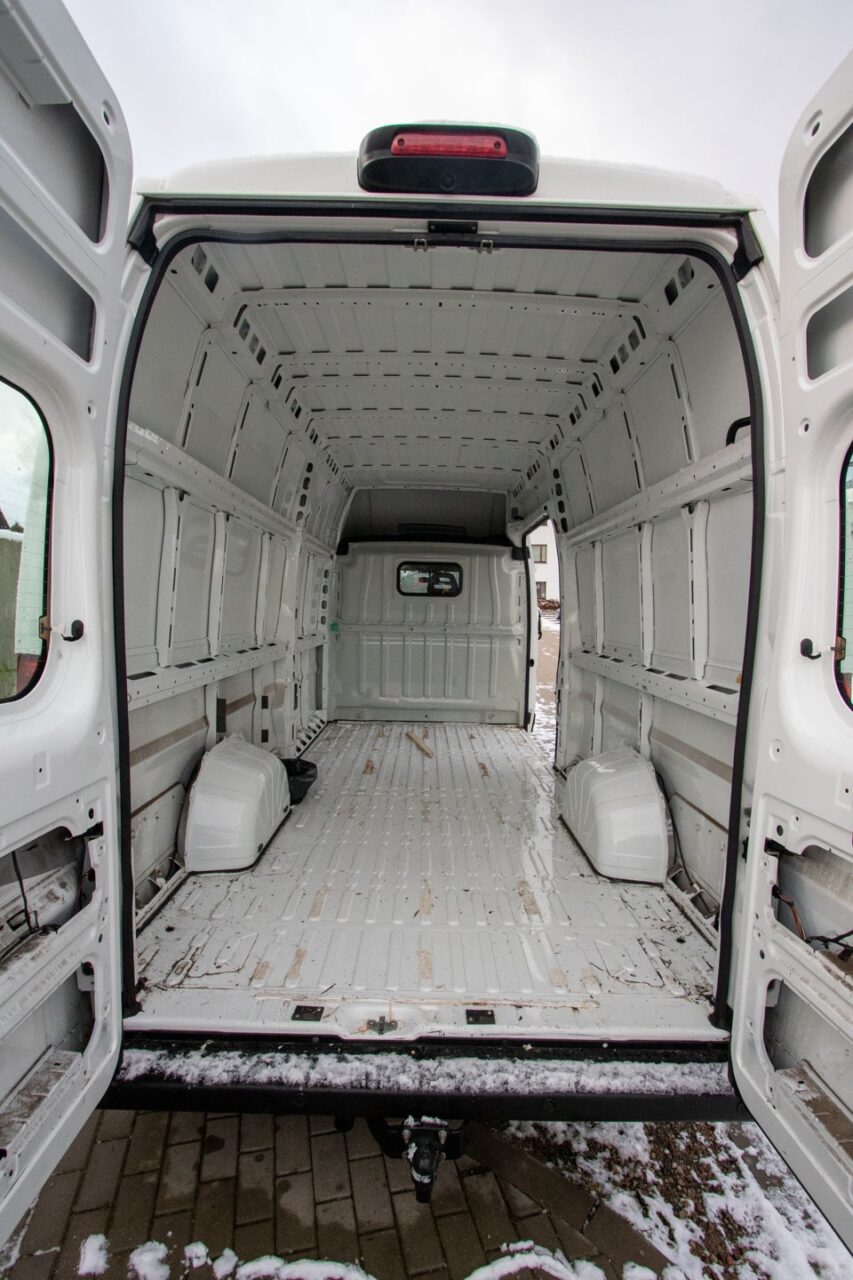
Be prepared for this to take longer than you think! Most van conversions take between 3-12 months depending on how much time you can dedicate to it.
Ours took 8 months while working full-time jobs, which meant lots of evenings and weekends covered in sawdust. There were definitely moments when we wondered if we’d ever finish!
Using pre-made components can speed things up, but you sacrifice the customization that makes DIY so rewarding. Some phases went super quickly (like framing), while others dragged on forever (wiring took WAY longer than expected).
Whatever your timeline, focus on quality over speed. You’re building something you’ll live in, so it needs to be solid, comfortable and safe for the long haul.
3. Should I just buy a pre-made camper instead?
When you see those shiny factory-built campers with price tags up to 230,000 EUR ($250,000), building your own starts looking pretty attractive!
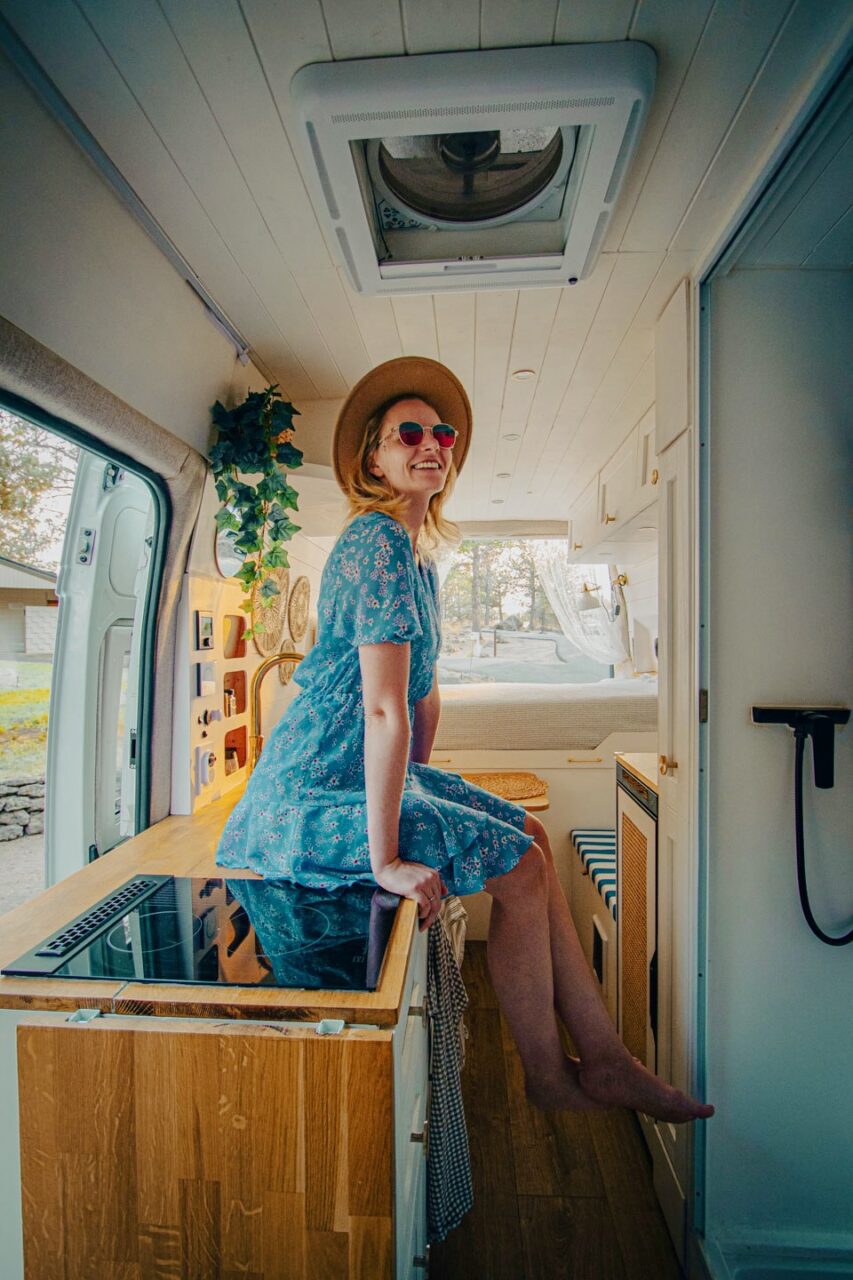
Besides the massive cost savings, DIY gives you something equally valuable – a home perfectly tailored to YOUR needs. Our friends with commercial campers are constantly compromising or modifying features that don’t work for them.
Building your own van also teaches you incredible skills. I had barely used a power drill before our build, and now I can troubleshoot almost any issue that pops up on the road. That confidence is priceless.
Plus, there’s something deeply satisfying about creating your own tiny home. Every time someone compliments our van, I feel this ridiculous burst of pride saying “we built it ourselves!”
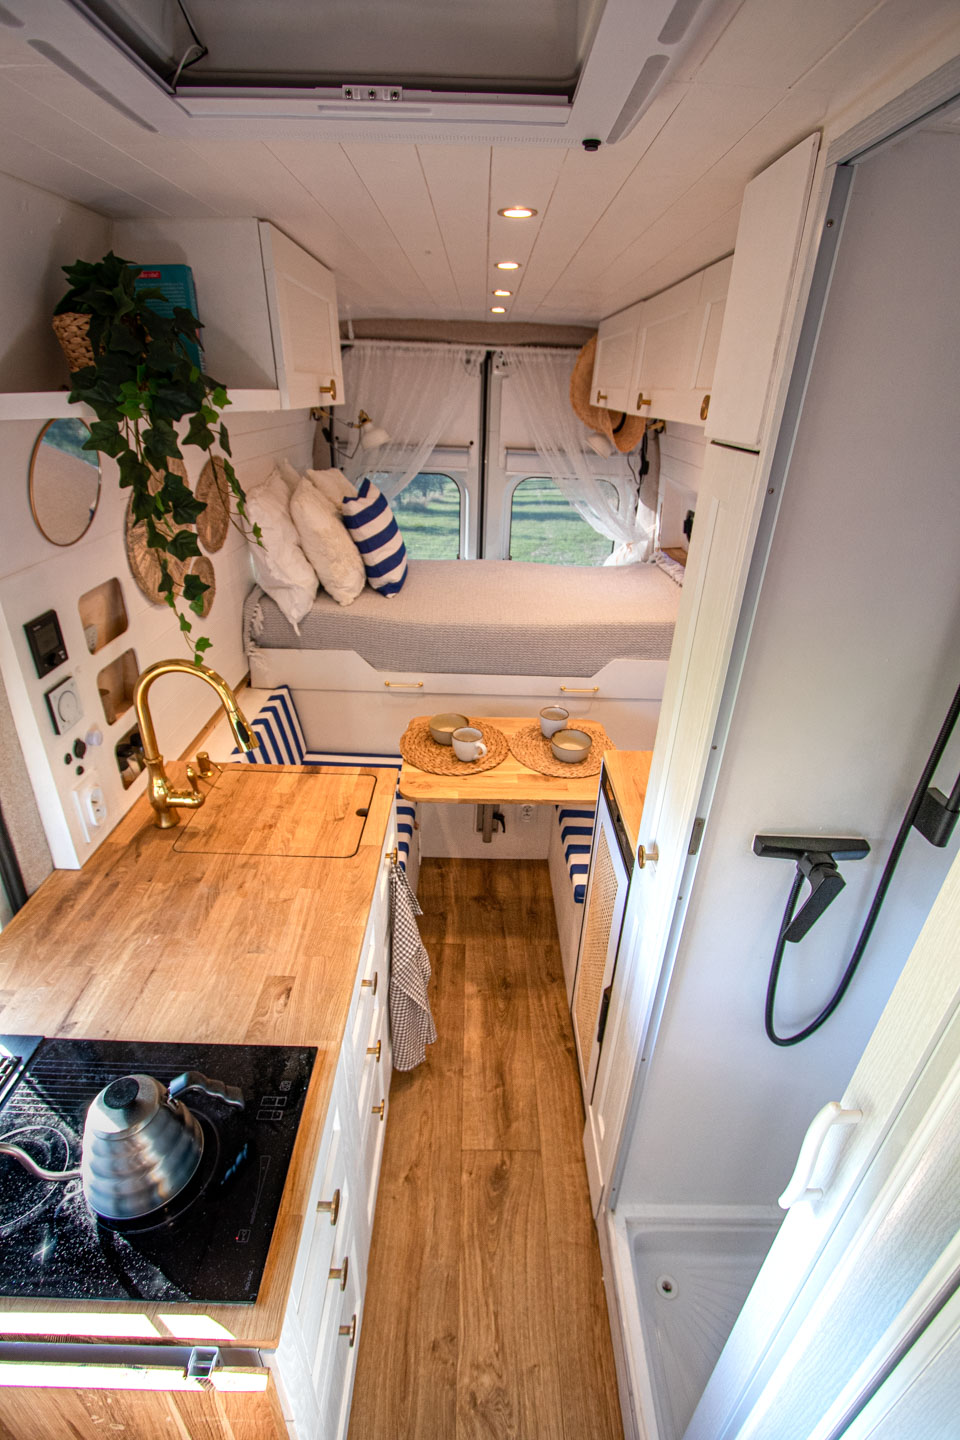
4. Is a DIY conversion really worth all the hassle?
Absolutely, yes! Despite the blood, sweat and occasional tears, I’d do it again in a heartbeat.
Beyond the money saved, having a custom space that perfectly fits our travel style has made our trips so much more enjoyable.
We designed specific storage for our climbing gear, built a desk that works perfectly for my partner’s remote job, and created a kitchen layout that makes cooking together possible (barely!).
If you’re planning to travel more than a month each year, the investment of time and energy really pays off. We’ve calculated that our van pays for itself after about 40 nights on the road compared to hotels or rental apartments.
5. What’s the real difference between a camper and a campervan?
It mostly comes down to size and maneuverability. Campervans typically stay under 7 meters (22 feet), making them much easier to park and drive on narrow roads.
Traditional motorhomes or RVs can stretch up to 14 meters (45 feet) and feel more like driving a bus!
Your choice really depends on your travel style. We went with a campervan because:
- We love exploring off-grid locations with limited access
- We prefer changing locations frequently rather than staying put
- We wanted something that could double as a daily driver
- Parking is WAY easier (especially in European cities)
Larger RVs make more sense for families or those who prefer staying at established campgrounds with hookups. They offer more space and amenities but less flexibility.

6. Which van makes the best conversion candidate?
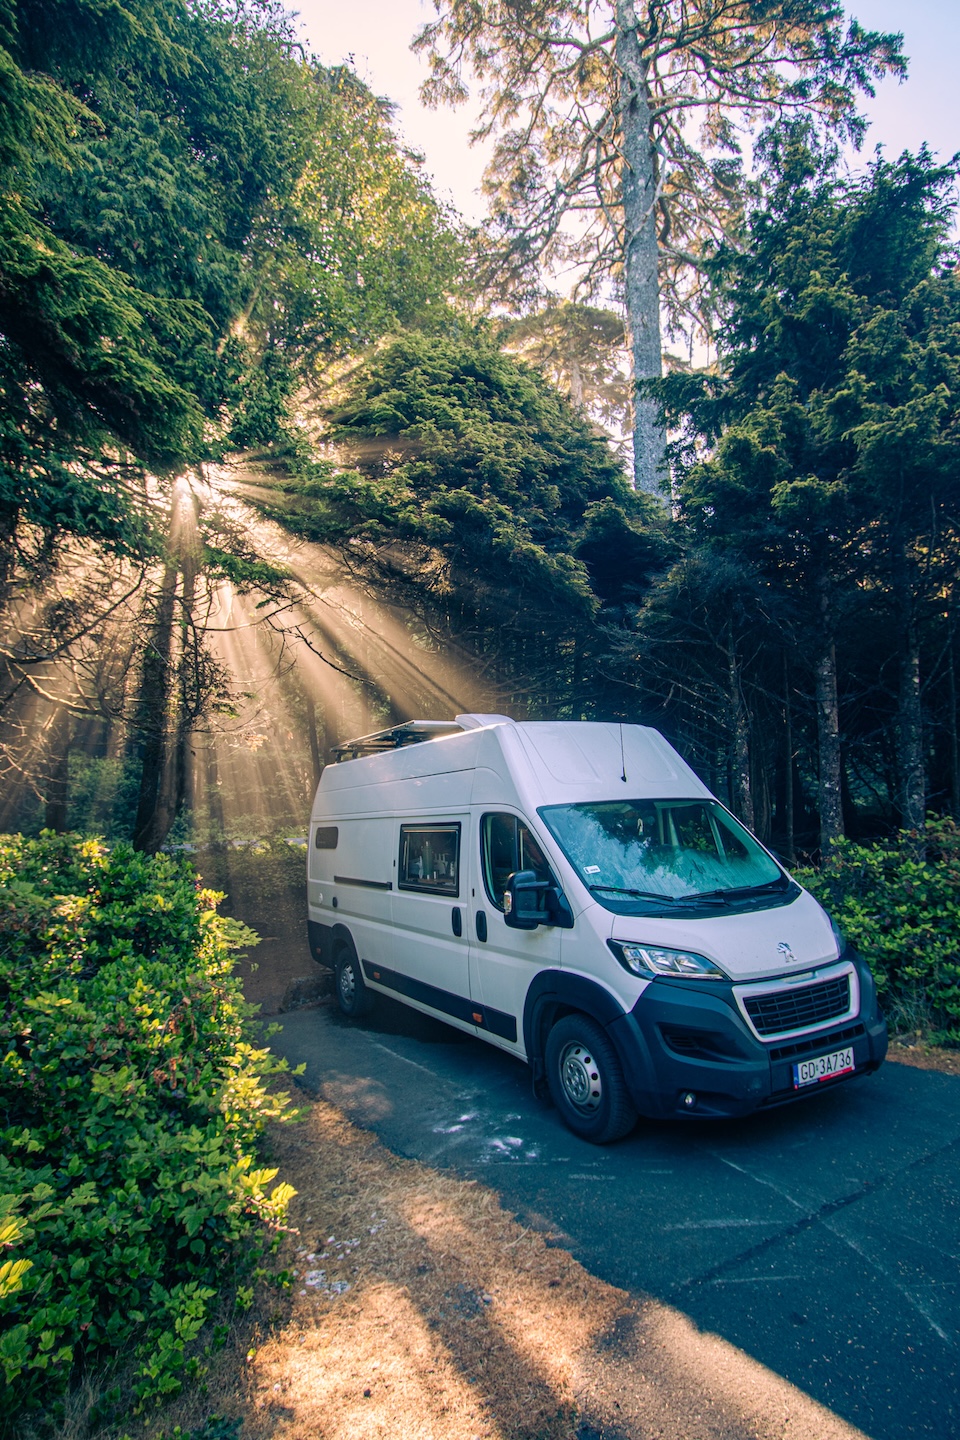
In Europe, the holy trinity of conversion vans is the Fiat Ducato, Peugeot Boxer, and Citroën Jumper (known as the Ram ProMaster in North America).
These models dominate the DIY scene for good reasons:
- Tons of conversion-specific components are available
- They’re affordable to buy and maintain
- Parts are readily available pretty much everywhere
- Their width allows sideways sleeping for people up to 180 cm (5’11”)
We went with the Ducato and have been happy with the decision. Other solid options include the Ford Transit, Volkswagen Crafter, and Mercedes Sprinter.
The Sprinter has become something of a status symbol in the van life world, but it comes with a higher price tag. The Transit offers a nice middle ground with slightly better reliability than the Ducato/ProMaster but without the Mercedes maintenance costs.
Whatever you choose, test drive several models and consider how the dimensions will affect your interior layout before committing!
7. How difficult is a DIY campervan conversion really?
I won’t sugarcoat it – converting a van is challenging, especially if you’re starting with limited DIY experience like we were.
That said, it’s definitely doable with research, patience, and a willingness to learn through mistakes (we made plenty!). YouTube became our best friend, and the van life community is incredibly supportive with advice.
The complexity really depends on how elaborate your build is. Adding electrical systems, plumbing, and gas definitely increases the difficulty level. Our bathroom was by far the most complicated element.
The most challenging aspects for us were:
- Getting perfectly square cuts in a decidedly non-square van
- Working in such a confined space (so many bruises!)
- The electrical system planning and execution
- Dealing with unexpected issues (our van had hidden rust we discovered mid-build)
Despite the challenges, the sense of accomplishment is incredible. Every little victory feels huge when you’re building something this personal.

8. Do I really need a toilet in my van?
This is one of those highly personal decisions that depends entirely on your comfort level and travel style.
We initially planned to skip the toilet to save space, but after renting a van without one for a two-week trip, we quickly changed our minds! Middle-of-the-night bathroom trips in the rain convinced us it was worth the extra effort and space.
If you’ll mostly stay at campgrounds with facilities, you might not need one. But for wild camping or boondocking, having your own toilet provides incredible freedom and comfort.
Modern options like cassette toilets and composting toilets are compact and relatively odor-free when properly maintained. We went with a cassette toilet since it’s easier to find disposal points in Europe.
Consider a portable option if you’re on the fence – you can always store it away when not needed.
9. Where do I even start with a conversion?
When we began our conversion, we felt completely overwhelmed until we broke it down into manageable steps.
Start with a solid project plan – sketches, measurements, and a detailed budget. Once you’re ready to actually work on the van, focus first on “shell” modifications:
- Cut holes for windows, roof vents, and exterior connections
- Install any mechanical upgrades (we added air suspension which was SO worth it)
- Get the van properly serviced before you start the interior build
Work from the outside in, and from the bottom up. Anything that requires cutting into the metal shell of the van should happen early in the process.
We made the mistake of not planning all our exterior cuts at once and ended up having to remove some interior elementsto add another roof vent later – a frustrating setback that could have been avoided!
10. Is ventilation really that important?
YES! A thousand times yes. Proper ventilation might not seem sexy, but it’s absolutely crucial.
Without good airflow, you’ll deal with:
- Cooking smells that linger forever (we learned this the hard way after cooking fish)
- Condensation leading to mold and mildew (particularly on cold nights)
- Stifling heat during summer months
- Stale air making the small space feel even smaller
We installed a MaxxFan on the roof plus two opening windows, which creates a nice cross-breeze. In retrospect, I might have added a second fan for even better airflow.
Don’t underestimate the importance of good ventilation – it’s one of those things you’ll never regret investing in.
11. What kind of wood should I use for cabinets?
Choosing the right wood makes a huge difference in both the weight and longevity of your build.
The key considerations are:
- Lightweight (every kg/lb affects fuel efficiency and handling)
- Moisture resistance (condensation is inevitable in a van)
- Structural integrity (your cabinets take a beating on the road)
We primarily used birch plywood, which offers a good balance of affordability, weight, and durability. For structural elements like the bed frame and cabinet frames, we used 12mm (1/2 inch) thickness.
For decorative elements and curved pieces, we went thinner with 6mm (1/4 inch).
Many van builders swear by lightweight marine or aviation-grade plywood, but those came with a serious price premium we couldn’t justify.
Whatever you choose, make sure it’s properly sealed to prevent moisture damage. We applied several coats of water-based polyurethane to all our wood surfaces and have had no issues after a year of use.
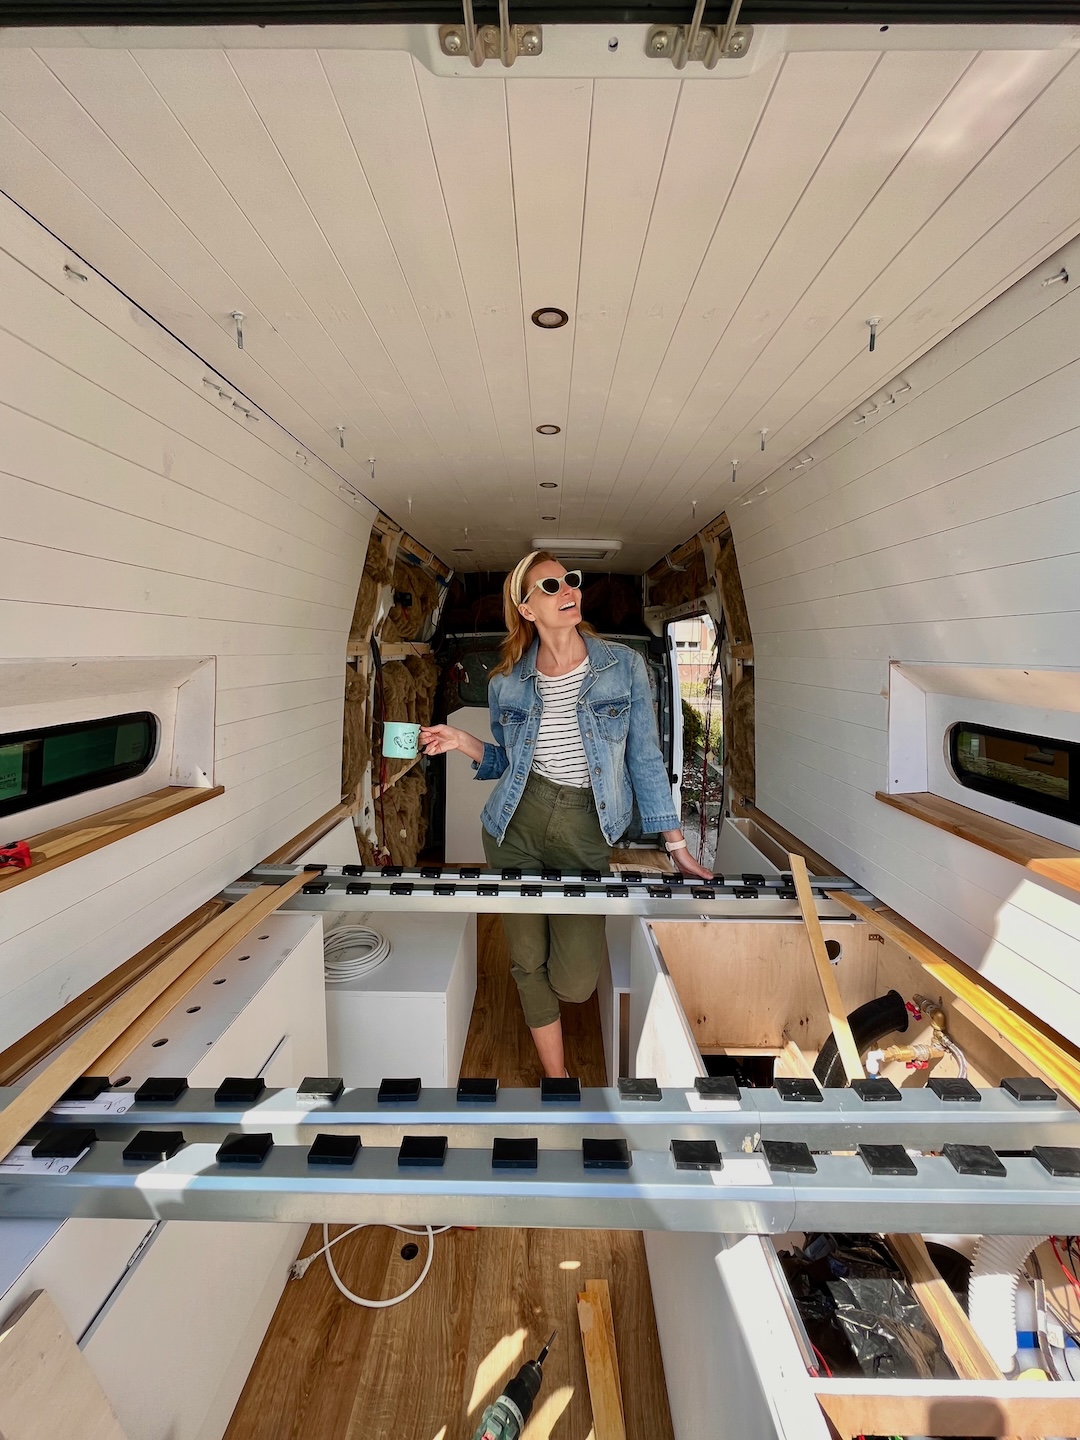
12. How do I actually build cabinets that don’t fall apart?
Building cabinets that can withstand constant road vibration requires some special considerations.
Start with accurate measurements – vans have almost no straight lines or right angles, which makes this tricky. We made cardboard templates for everything before cutting the actual wood.
For construction:
- Begin by assembling with screws only (no glue yet)
- Test-fit everything in the van
- Make adjustments as needed (and there will be many!)
- Once satisfied with the fit, disassemble, add wood glue, and reassemble
- Reinforce corners and stress points with metal brackets
- Sand all edges smooth (you’ll bump into everything eventually)
- Apply a durable finish that can be cleaned easily
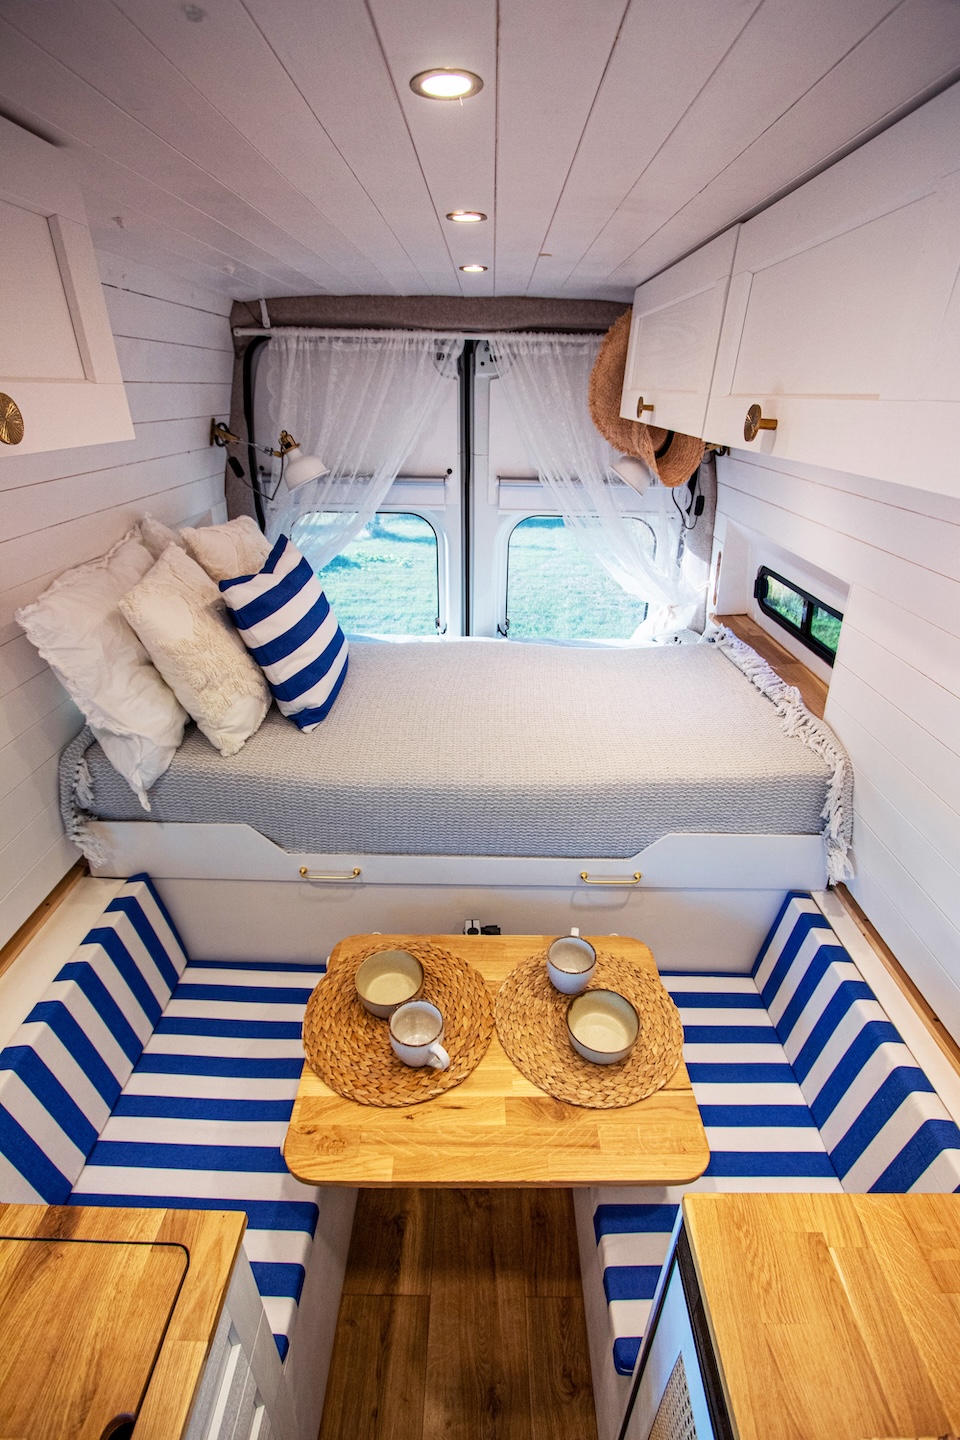
We learned to use combination countersunk holes and wood screws with lock-tight to prevent loosening from vibration. Also, rounded corners on all cabinets have saved us countless bruises!
13. What’s the best way to insulate the walls?
Insulation might seem boring, but it’s literally the barrier between you and the outside world, so don’t skimp here!
Look for materials that are:
- Thermally efficient
- Non-combustible (safety first!)
- Non-toxic (you’re living in this tiny space)
Our insulation process:
- Applied sound deadening mats to reduce road noise (like Kilmat or Noico)
- Installed XPS foam board as the main insulation layer (great R-value for the thickness)
- Sealed gaps with expanding foam
- Added a layer of reflective insulation in certain areas
- Covered everything with thin plywood and fabric
Different materials have different strengths – mineral wool has better sound dampening but is harder to install in curved areas, while foam boards cut easily but can leave gaps.
The debate around vapor barriers in vans is ongoing. We opted against a complete vapor barrier based on our climate and traveling plans, focusing instead on good ventilation to manage moisture.
14. Should I bother insulating the ceiling?
Absolutely! The roof receives direct sunlight and can turn your van into an oven without proper insulation.
Our ceiling insulation approach:
- Applied sound deadening material first (the rain noise on a metal roof is intense!)
- Installed 25mm (1 inch) PIR insulation boards (they’re thin but effective)
- Added a reflective layer to bounce heat
- Covered with 5mm plywood and fabric for a finished look
The ceiling is actually where you’ll get the most benefit from insulation – heat rises in winter and the sun beats down in summer.
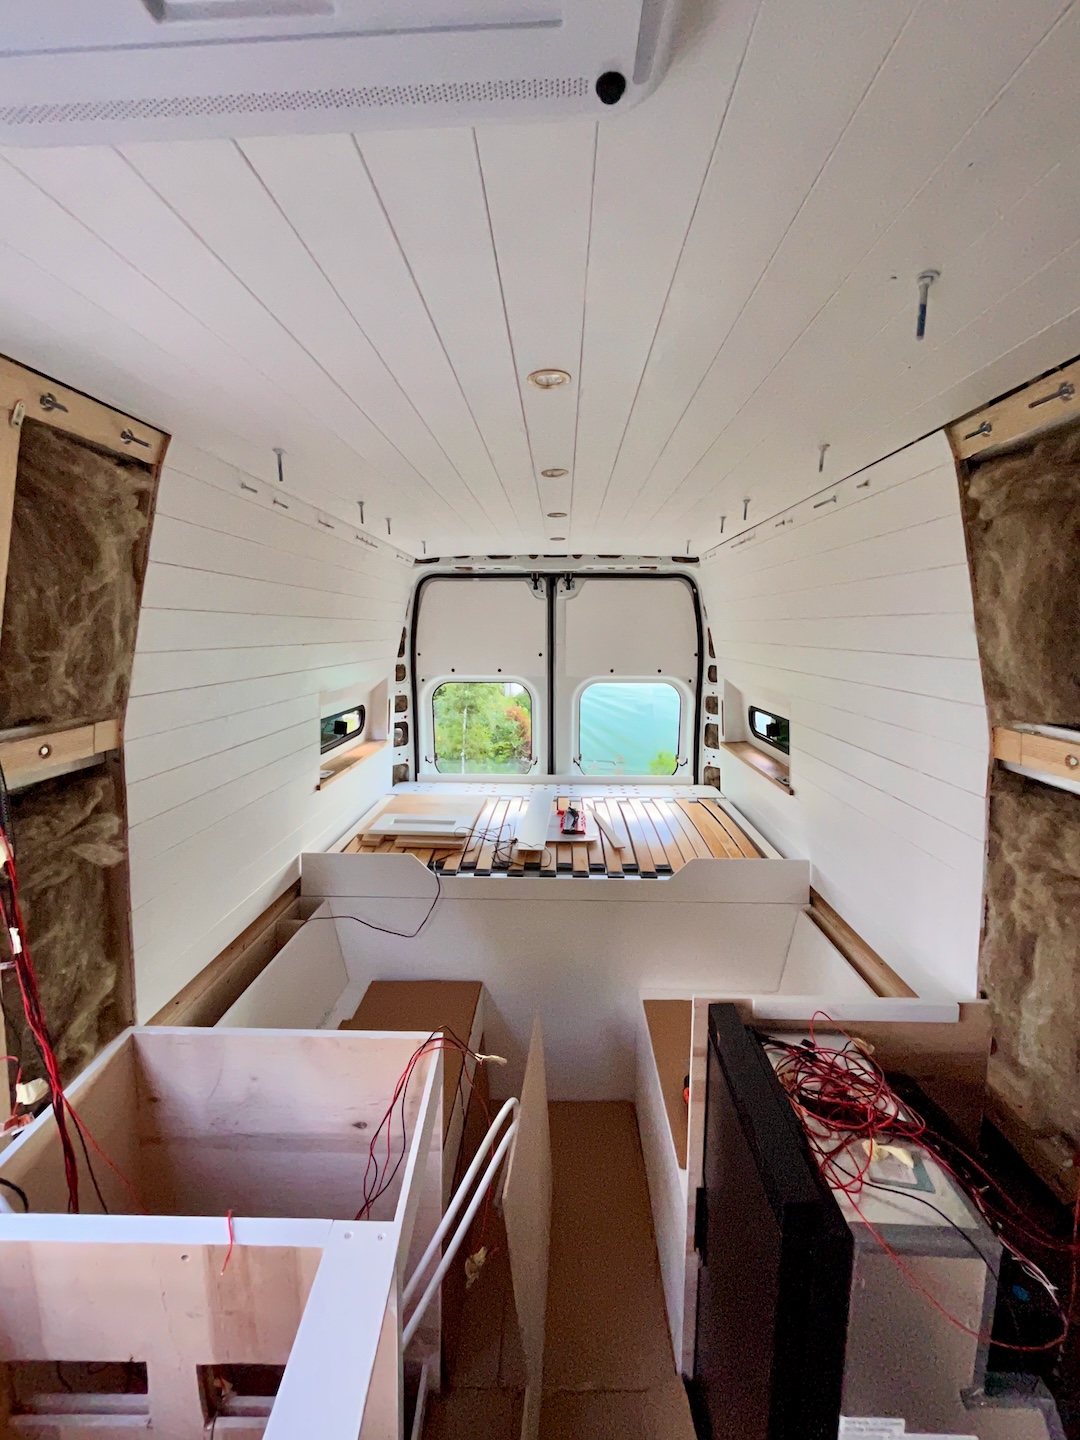
An added benefit of ceiling insulation is noise reduction. The difference in rain noise before and after insulation was dramatic – from deafening to actually quite pleasant!
15. What about insulating the floor?
Floor insulation is often overlooked, but it makes a huge difference in comfort and heat retention.
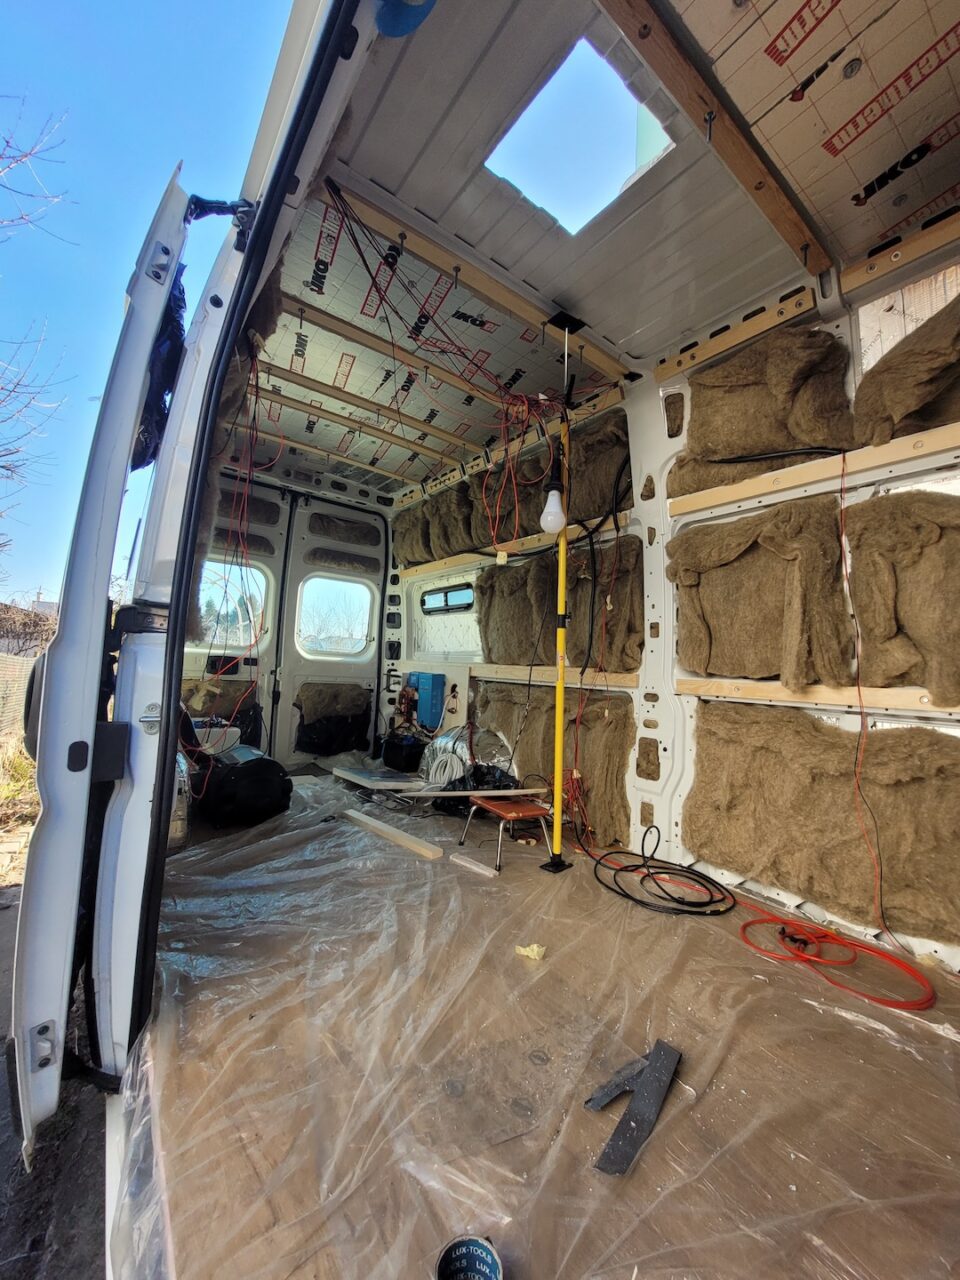
Our floor insulation layers:
- Started with polyethylene foam to smooth out the ridges in the van floor
- Added 20mm (3/4 inch) XPS insulation board for thermal protection
- Topped with 12mm (1/2 inch) plywood for structural support
- Finished with vinyl flooring for a waterproof, cleanable surface
The floor is your foundation for everything else, so it needs to be solid. We spent extra time ensuring it was perfectly level before moving on, which made cabinet installation much easier.
A well-insulated floor keeps your feet warm in winter and provides an additional sound barrier from road noise. It’s well worth the effort and materials!
16. What flooring material works best in a van?
Your floor takes incredible abuse in a van – dirt, moisture, spills, and constant foot traffic.
The ideal flooring should be:
- 100% waterproof (not water-resistant, but truly waterproof)
- Easy to clean (you’ll be tracking in all sorts of outdoor mess)
- Durable enough to withstand shifting weight and vibration
- Lightweight to minimize your overall build weight
We chose vinyl click–flooring, which has performed beautifully. It’s completely waterproof, cleans up easily, and has a warm, homey look.
Avoid carpet at all costs – it holds moisture, dirt, and odors. Some people like the look of wood floors, but unless properly sealed, they’re vulnerable to water damage.
Whatever you choose, make sure it’s secured properly and won’t shift while driving. We used flexible flooring adhesive rather than floating our floor to prevent movement.
17. How do I keep warm in the winter?
Winter van life requires serious consideration, even if you think you’ll only travel in summer (plans change!).
Effective winter warmth requires:
- Thorough insulation in all areas (walls, ceiling, floor, windows)
- A reliable heating system sized for your space
- Methods to manage condensation (ventilation is key!)
Even with great insulation, you’ll need a dedicated heater for winter travel. We installed a diesel heater connected to the van’s fuel tank, which provides reliable heat without consuming our limited propane supply.
Insulation not only keeps you warm in winter but also cooler in summer – it works both ways! The investment pays off year-round.
Some practical winter tips we’ve learned:
- Insulated window covers make a HUGE difference at night
- A dehumidifier helps manage moisture on particularly cold nights
- Small rugs over vinyl flooring add cozy warmth underfoot
18. Can I actually use my van in winter?
With proper preparation, absolutely! Winter van life requires some extra considerations:
- Keeping interior temperatures above freezing to protect plumbing
- Preventing battery damage (LiFePO batteries shouldn’t be charged below freezing)
- Managing condensation to prevent mold
- Having backup systems in case of heater failure
Our first winter trip taught us the importance of ventilation even in cold weather. It seems counterintuitive to open vents when it’s freezing outside, but airflow is essential to prevent condensation from building up on every surface.
Temperature and humidity management become critical skills for winter van life. We installed a small temperature/humidity monitor that helps us maintain the optimal balance.
With good systems in place, winter van travel can be incredibly rewarding – snowy landscapes, empty camping spots, and the satisfaction of being cozy while snow falls outside.

19. What’s the most efficient way to heat a van?
After researching various heating options, we found diesel heaters to be the most efficient for our needs.
The main heating systems available are:
- Diesel heaters (like Webasto or Chinese alternatives)
- Propane heaters (like Truma)
- Electric heating (only practical when connected to shore power)
- Wood stoves (charming but impractical in small spaces)
We chose a diesel heater because:
- It draws fuel directly from the van’s tank (no separate fuel to carry)
- Extremely efficient fuel consumption
- Dry heat that doesn’t create additional moisture
- Works at high altitudes unlike some propane systems
- Can run all night without concern
The initial installation was complicated, but the convenience has been worth it. Some systems can also be connected to water heaters for combined efficiency.
Whatever system you choose, make sure it’s properly ventilated and includes carbon monoxide detection for safety.
20. What ongoing costs should I budget for?
Van life isn’t free, and ongoing costs can add up quickly if you’re not prepared. The main expenses to plan for:
- Fuel: Our van averages 10L/100km (about 25mpg), which means roughly €20 for every 100km depending on diesel prices
- Insurance: Basic liability is affordable, but comprehensive coverage with international breakdown assistance costs us about €1,000 annually
- Maintenance: Parts for larger vehicles cost more, and repairs are generally more expensive than for regular cars
- Storage: If you can’t park at home during periods you’re not traveling, you’ll need to rent space
We track all our expenses in a spreadsheet to understand our true cost of van life. Despite these ongoing costs, it’s still significantly cheaper than paying for accommodations while traveling.
Budget for regular maintenance to avoid larger problems down the road. Our 6-month service intervals have helped catch small issues before they became major headaches.

Travel lighter, even before you leave.
start with something simple.
Download The Minimum Plan – Slow Travel:
Final Thoughts on Van Build
Building a campervan is hands-down one of the most challenging and rewarding projects I’ve ever undertaken. Despite the occasional frustrations and setbacks, I’d do it again in a heartbeat.
The freedom to travel on your own terms, wake up in stunning locations, and have all your essentials with you is truly priceless.
Our van has become more than just a vehicle – it’s our tiny home, adventure basecamp, and conversation starter all rolled into one.
If you’re on the fence about starting your own conversion, I hope this guide has answered some of your questions and given you the confidence to take the plunge.
Have you started your own van build or are you planning one? I’d love to hear about your experiences – shoot me an email!
Pin it for later!
More articles you might be interested in:
