
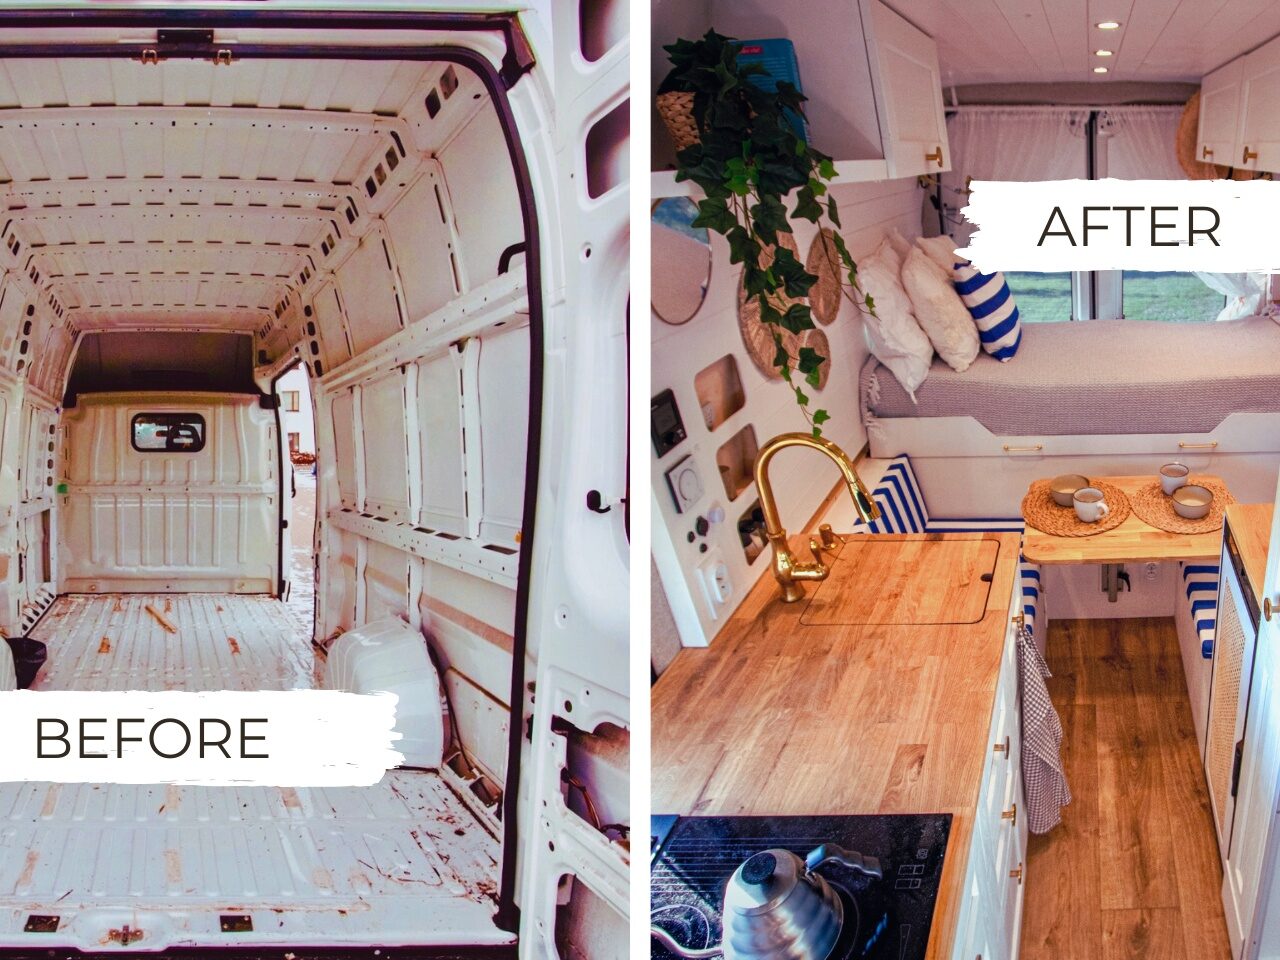
Thinking about building your own campervan and stepping into van life? It’s such an exciting (and slightly overwhelming) place to be.
This guide builds on everything I shared earlier, but here I wanted to go a bit deeper into the practical side – the things you really start to feel once you move from ideas to actually turning a van into a small home on wheels.
We’ll talk about budgeting, safety, and how to think about power and charging in a way that actually works in real life – not just on paper.
If you’re ready, let’s get into it and start shaping your own version of van life.
Want to learn more about traveling by campervan?
On my Van Life Hub, you’ll find more articles on building a campervan, van travel, real costs of van life, and practical tips from routes across the U.S.
1. Plan Your Budget First
Start your campervan journey by getting clear on your budget before you pick up any tools.
Begin by listing your 10 biggest expenses and checking both budget and premium options online. Add everything up, then compare the lowest and highest possible totals. In real life, most builds end up much closer to the higher end.
You can use a simple estimate like this:
What you’ll likely spend = Lowest price + 80% of (Highest price − Lowest price)
For example, if budget options total $50,000 and premium versions reach $100,000, a realistic estimate would be around $90,000.
Getting clear on your budget early makes every decision easier later – especially when upgrades and “nice extras” start to creep in.
And always leave some margin. You’ll need it.

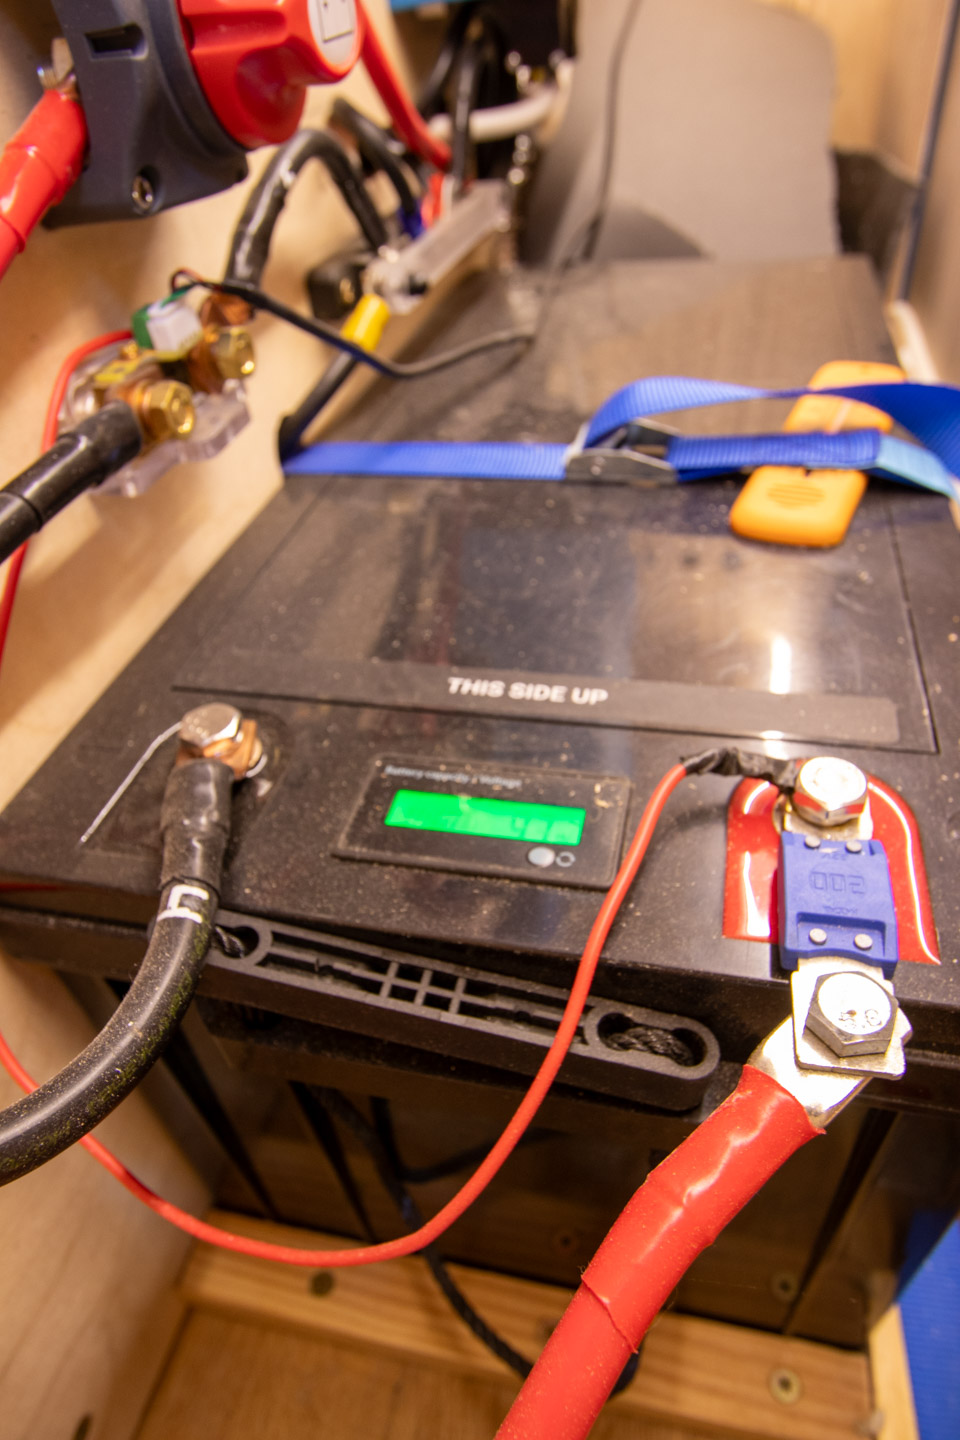
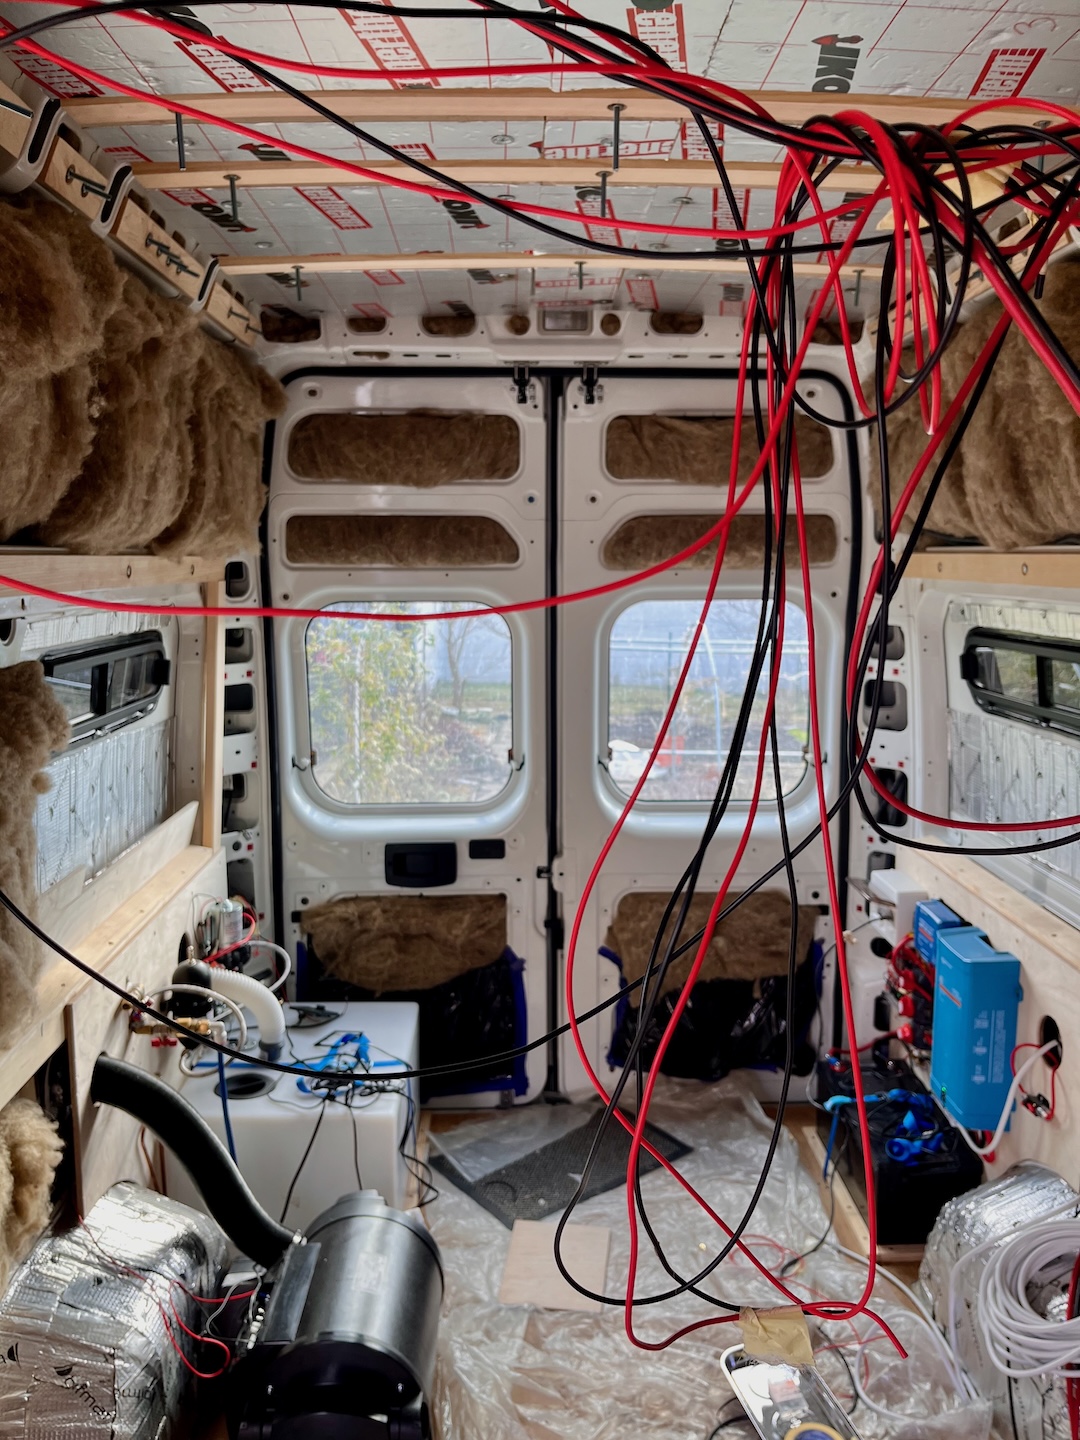
2. Set Up the Right Charging System
Your electrical setup is what keeps everything running – so it’s worth thinking it through properly.
You’ve got three main charging options: solar panels, your vehicle’s alternator, and external shore power.
Using all three gives you the most flexibility, but the best setup really depends on how you travel:
For longer stays in one place
Solar + shore power works best. Solar keeps things running off-grid, and shore power gives you a reliable backup when needed.
For road trips and off-grid travel
Solar + alternator charging is ideal. Solar covers you during the day, and the alternator charges your battery while you drive.
The key is to match your system to your rhythm – not someone else’s setup.
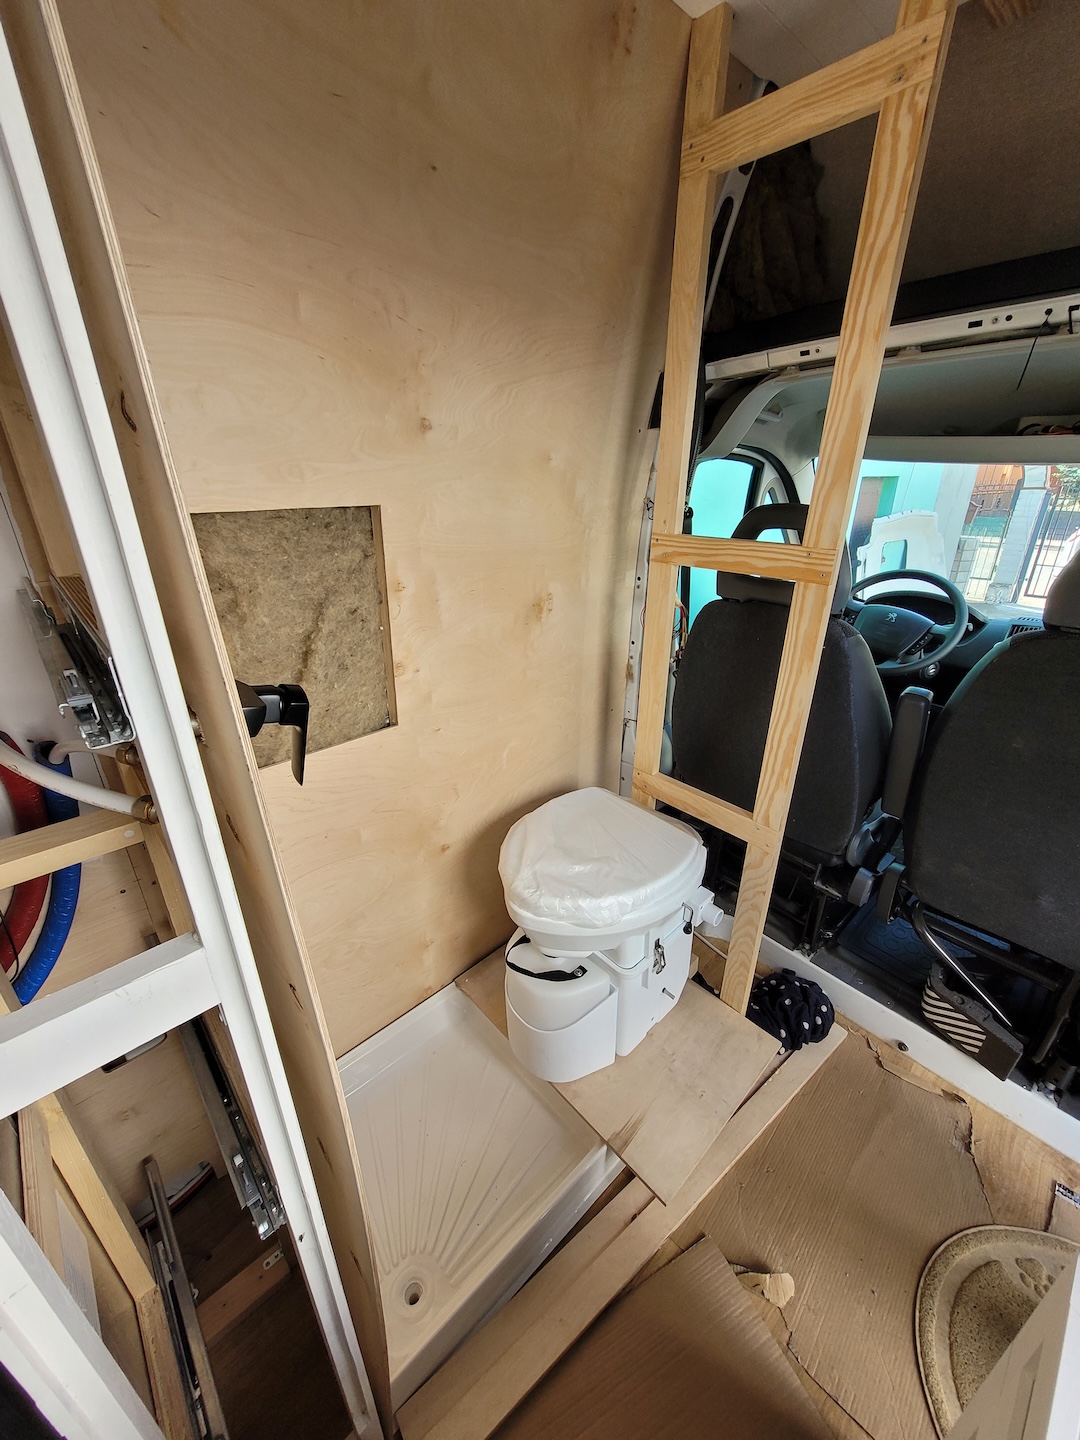
3. Don’t Overlook Water Drainage
If you’re adding a shower, drainage is something you really don’t want to overlook.
Place your drain at the natural low point, where water will flow on its own. It sounds simple, but it makes a huge difference – and helps you avoid annoying puddles inside your van.
Also think about how your van actually sits when parked, and design your drainage around that.
It’s one of those small details you don’t notice when it works – but you definitely notice when it doesn’t.
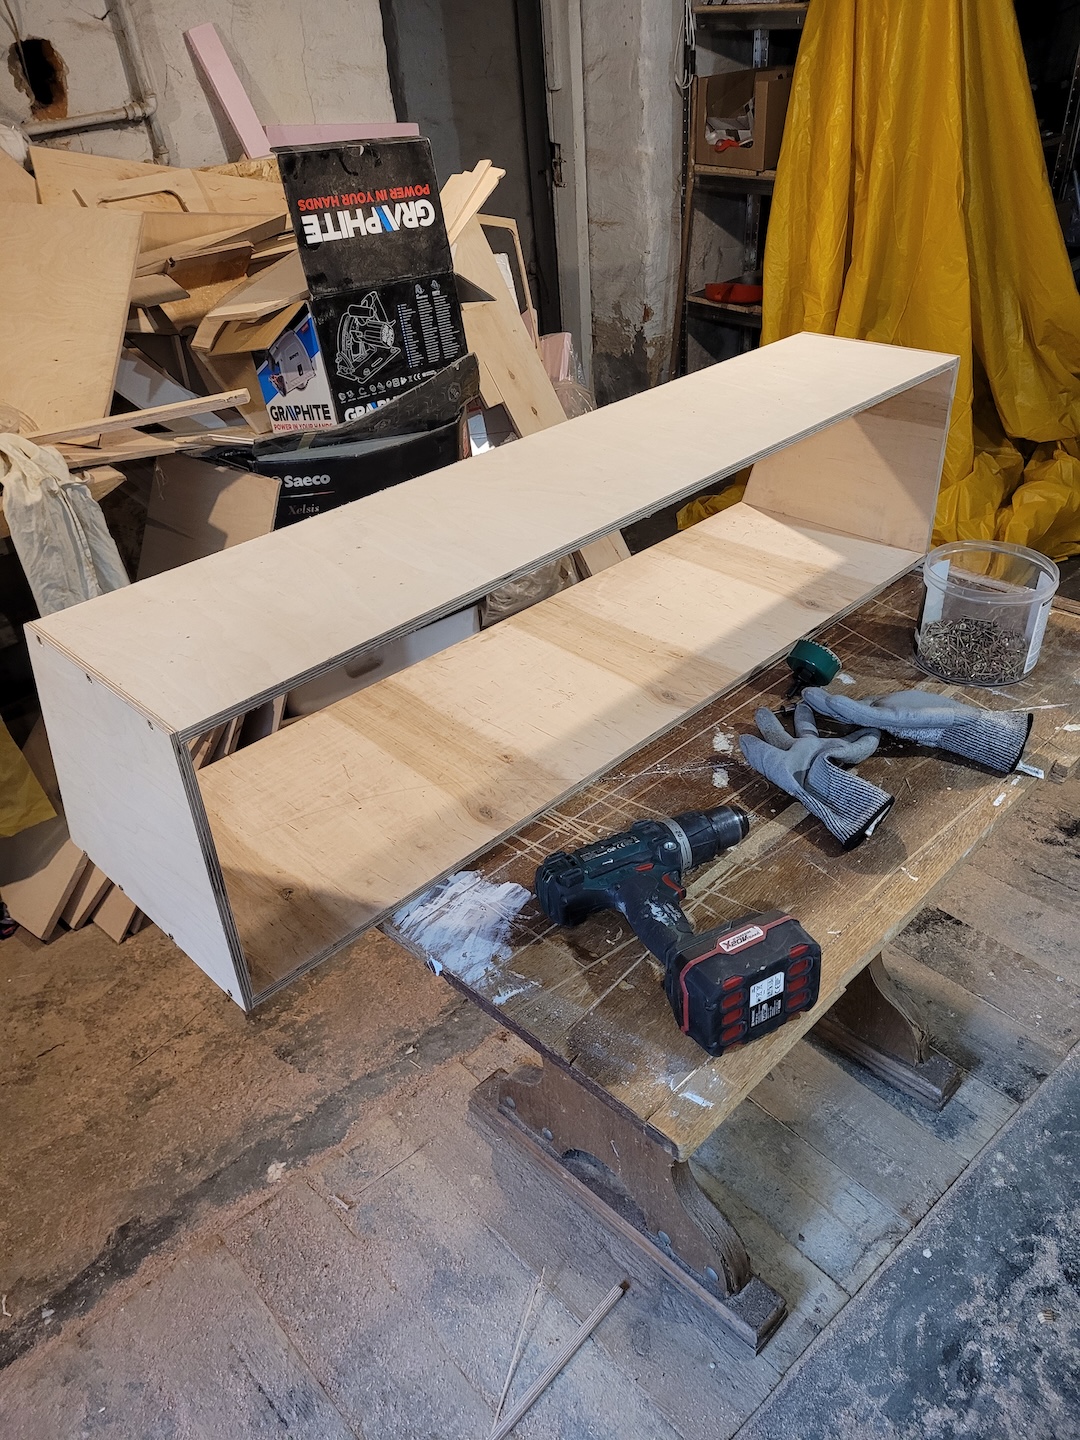
4. Build in a Modular Way
Think of your van build like a set of building blocks – pieces that fit together, but can also be taken apart when needed.
It takes a bit more planning at the beginning, but it makes everything easier later.
If something breaks, you don’t have to dismantle half the van. You can just remove and fix one section.
It also gives you more freedom while building. You can work on components outside the van (where you actually have space), and install them later.
It’s a flexible approach that lets your space evolve over time.
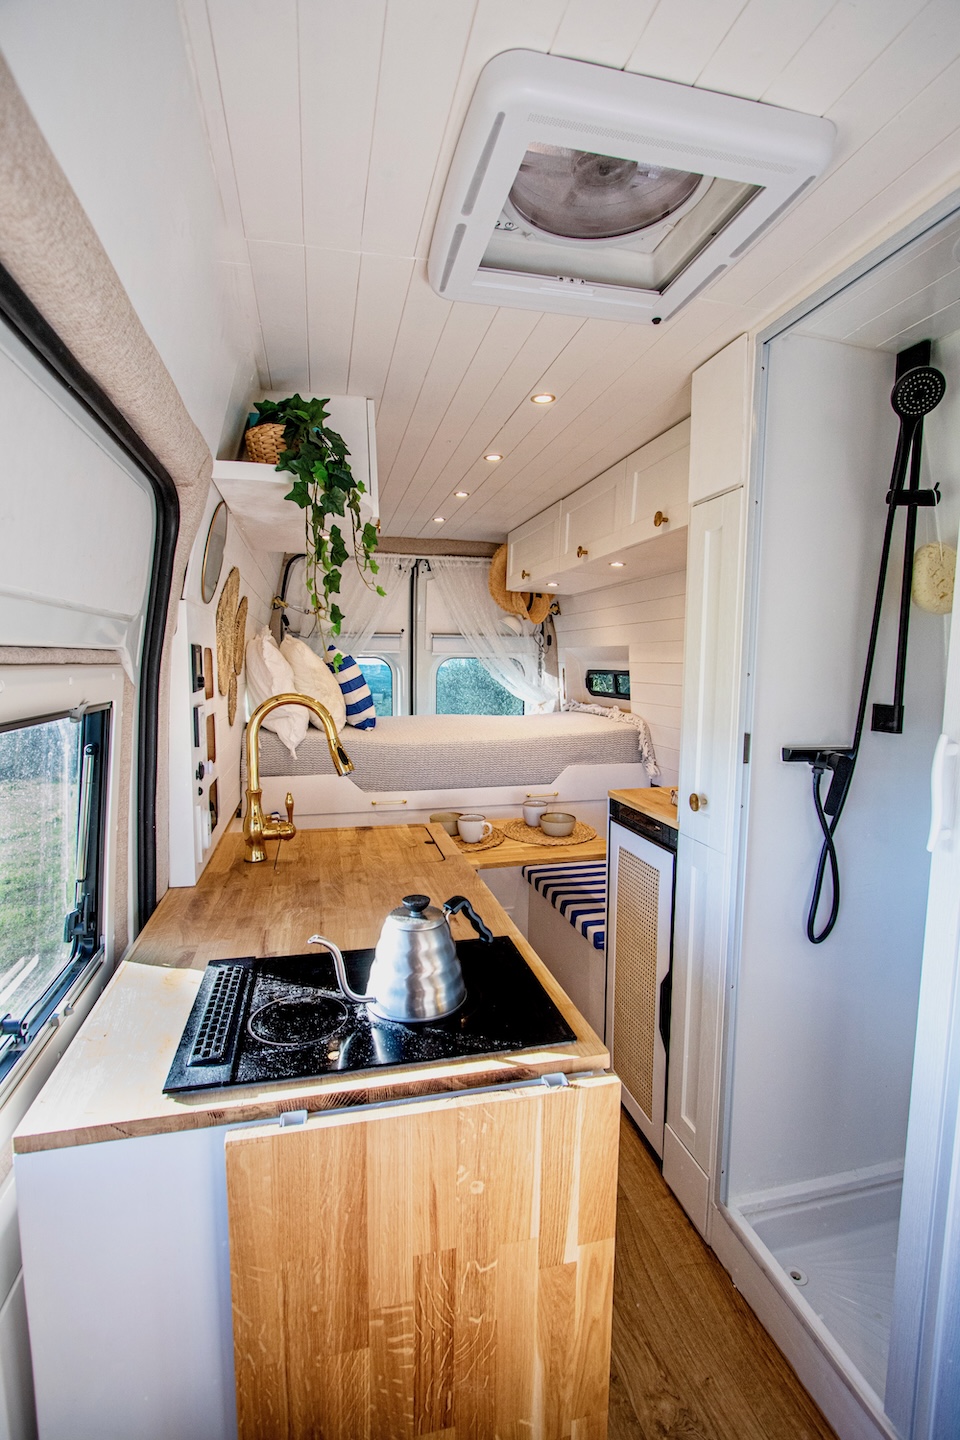
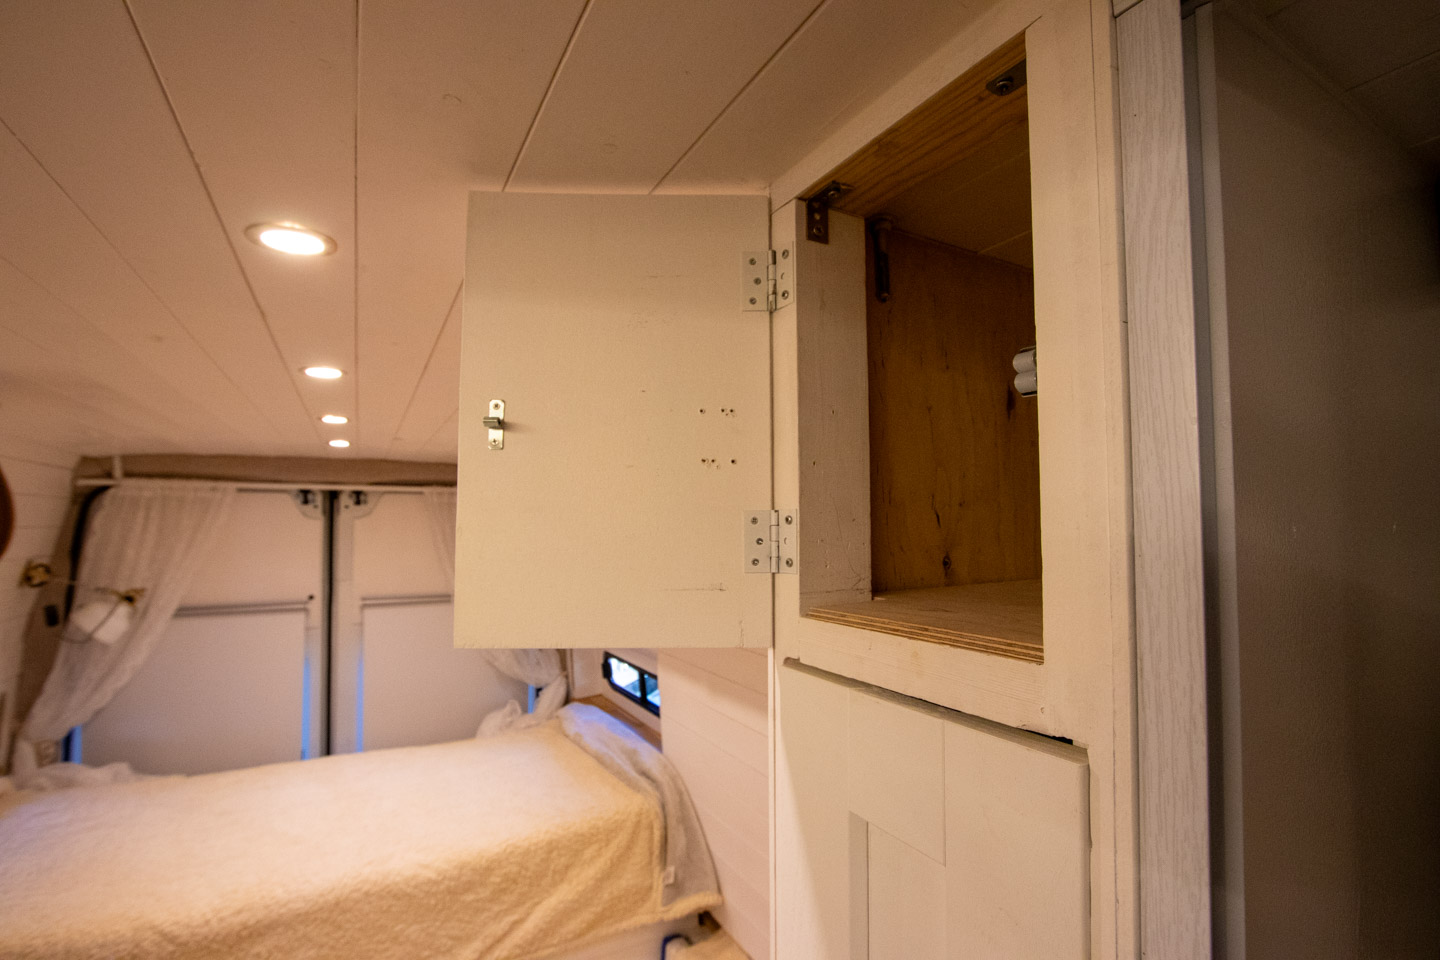
5. Make Every Inch Count
Space is limited – but how you use it makes all the difference.
Think in layers and functions: fold-away tables, hidden storage, multi-use areas.
Use overlooked corners for storage – shelves, drawers, baskets, custom compartments. These small decisions add up quickly.
Most importantly, design your van around your lifestyle. Cooking, working, relaxing – what matters most to you?
With thoughtful planning, even a small van can feel surprisingly open and comfortable.
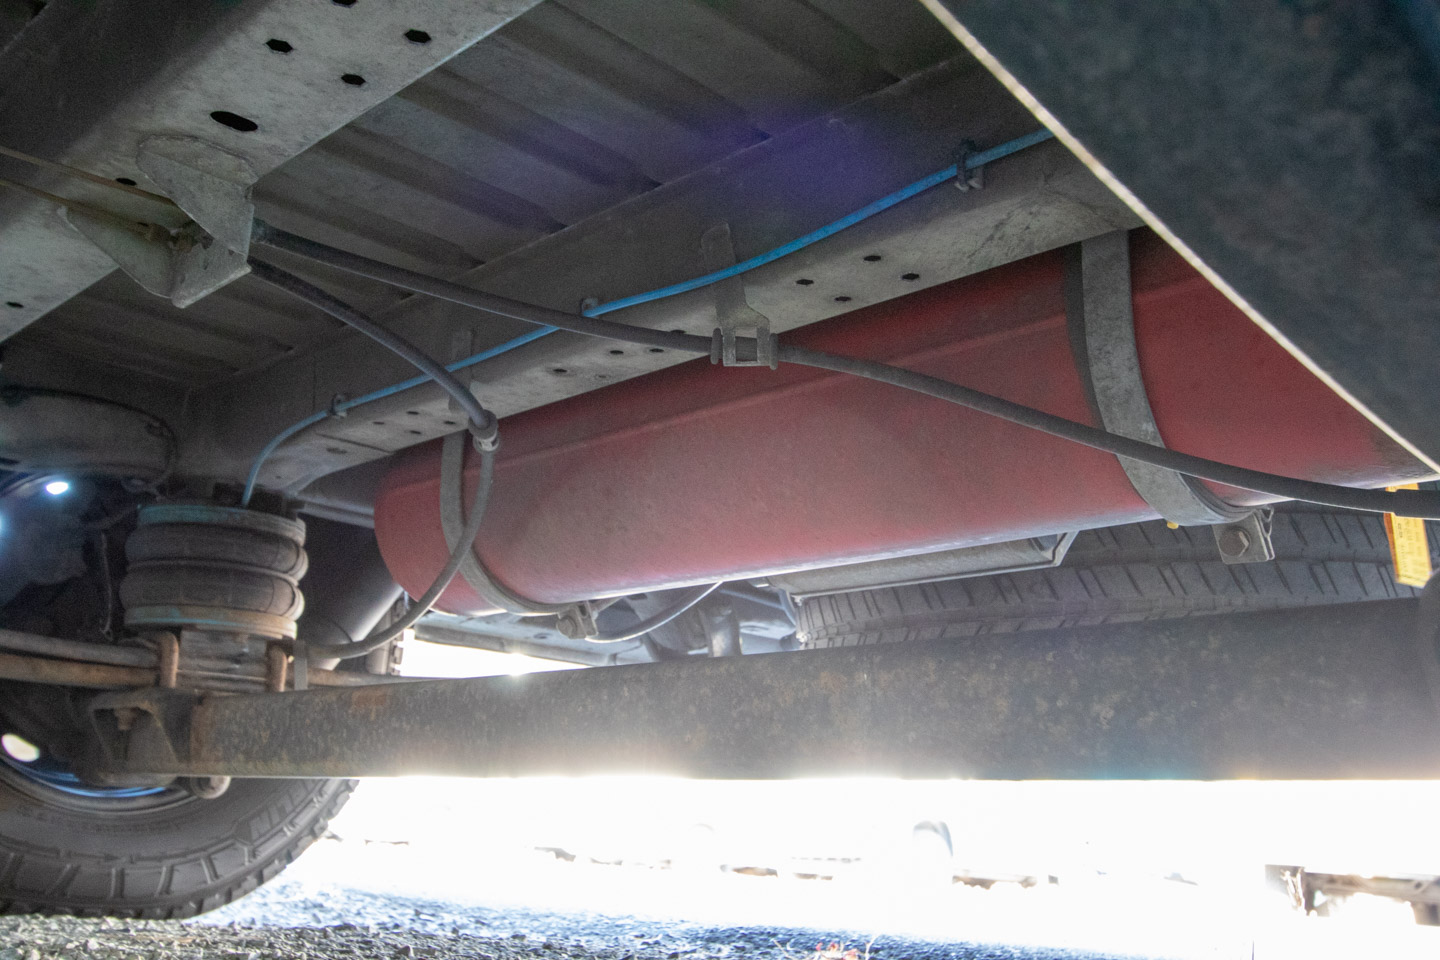
6. Plan Your Gas System Early
This is one of those decisions that’s much easier to make early on.
Many van builds place gas cylinders inside, but it’s worth considering an external tank mounted under the chassis.
It frees up interior space and often allows for a larger capacity – sometimes even double what portable cylinders offer.
It can also make refueling easier, especially if you install a permanent refill connection (similar to LPG systems in cars).
If you’re planning to travel internationally, don’t forget adapters for different LPG systems – a small detail that can save you a lot of stress.
And for safety, it’s always a good idea to have your gas system installed or at least checked by a professional.
Ready to tackle your own van conversion but feeling overwhelmed by all the details?
I share every step of my build process, complete with mistakes to avoid and money-saving tips from my own experience.
Sign up to grab my Ultimate Van Build Checklist and kickstart your conversion!

7. Map Out Your Electrical Outlets Early
Think about where your 12V and 230V outlets will go before you start building.
Start with your daily routines – where you’ll work, charge your phone, use your laptop, or plug in kitchen gear.
Good planning here saves you from messy cables, awkward extensions, and constant rearranging later.
Also think about cable management. Hiding wires behind cabinets or running them through proper channels makes the space feel cleaner, safer, and much easier to live in.
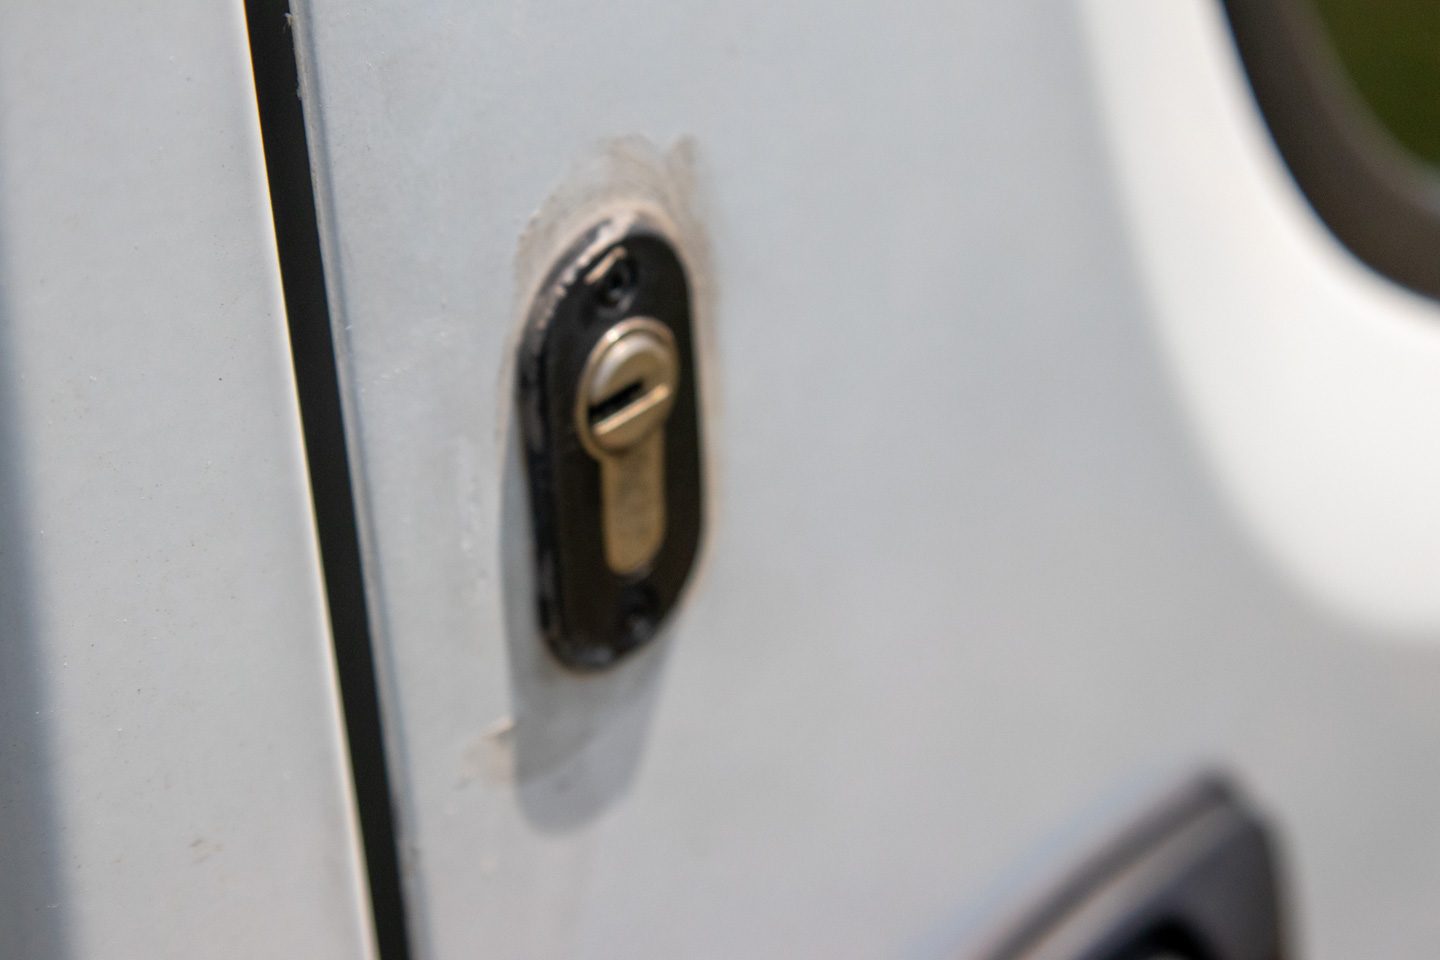
8. Add Security from the Start
Security is something worth thinking about from day one.
Factory locks are rarely enough, so consider adding stronger locks, interior cameras, or reinforced windows.
These small upgrades make a big difference – whether you’re out exploring or sleeping somewhere remote.
And don’t forget insurance. The right coverage protects both your build and everything inside it, so you can actually relax once you’re on the road.
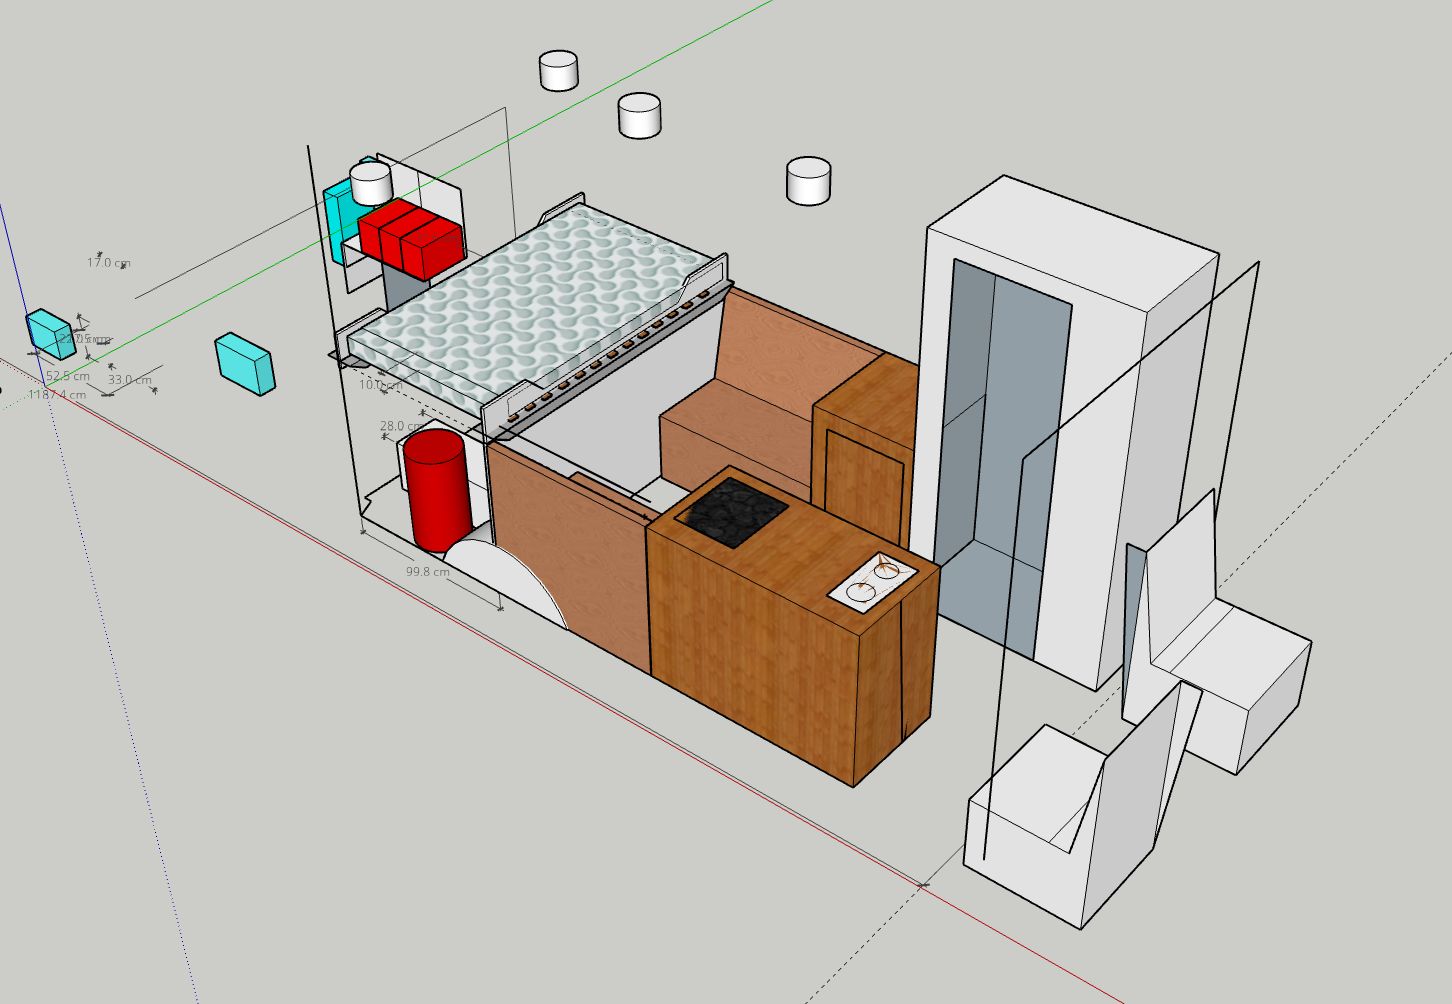
9. Combine Digital Plans with Real-Life Mockups
Use tools like SketchUp to plan your layout and visualize everything before you start cutting.
But don’t stop there.
Simple cardboard mockups are just as important. They let you test real dimensions, movement, and comfort inside the van.
Because something that looks perfect on screen doesn’t always feel right in real life.
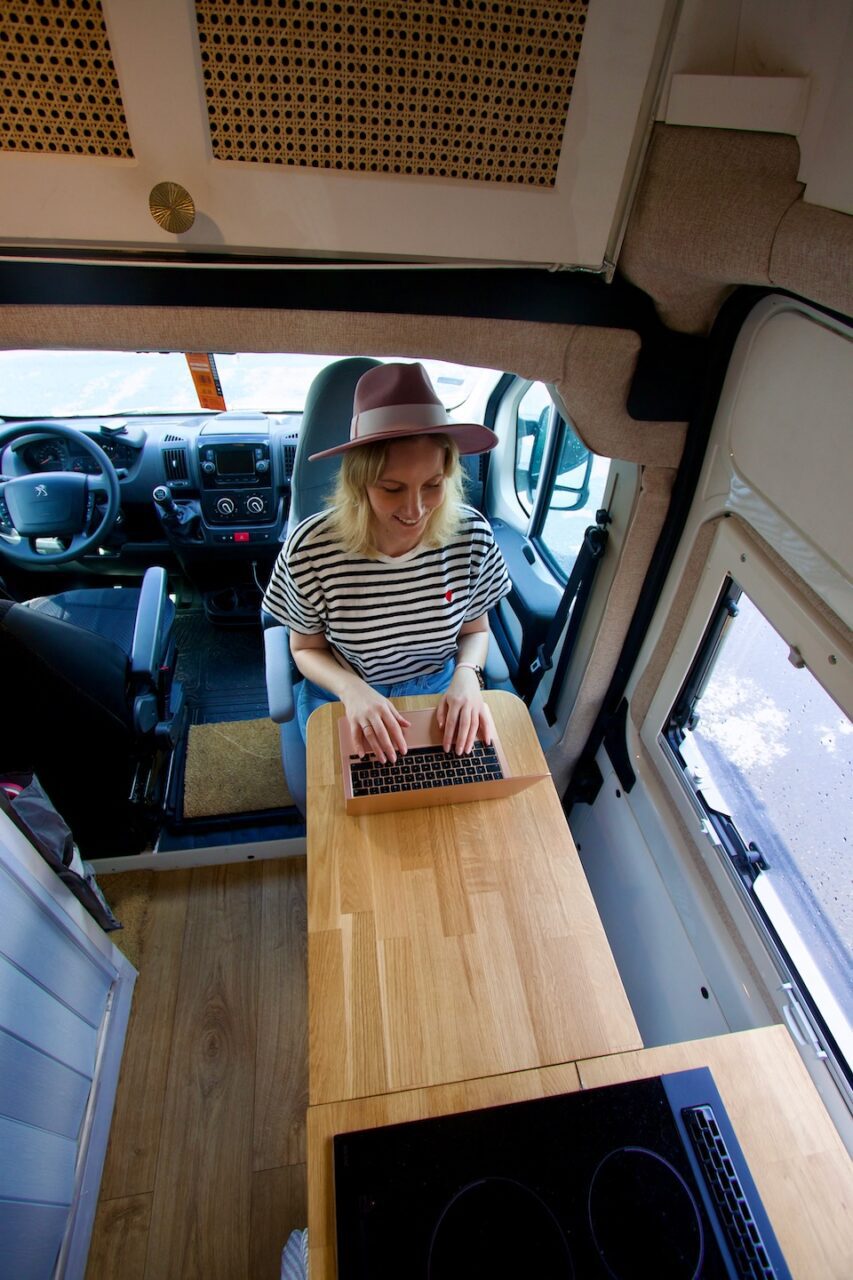
10. Design for Both Work and Travel
If you plan to work from your van, design for it from the beginning.
Create a space that actually feels comfortable to use – proper seating, a stable surface, and good lighting.
Think about internet access and power independence too. A solid battery setup (and ideally solar) makes a huge difference if you’re off-grid.
And give your gear a dedicated place – it keeps everything organized and makes daily life much smoother.
11. Test Everything as You Go
Don’t wait until the end to test things.
Check your electrical system before closing the walls. Test plumbing before sealing everything up.
Catching issues early saves you from a lot of frustration later – especially when everything is already finished.
Small problems are easy to fix at the beginning. Much harder once everything is hidden behind panels.

Travel lighter, even before you leave.
start with something simple.
Download The Minimum Plan – Slow Travel:
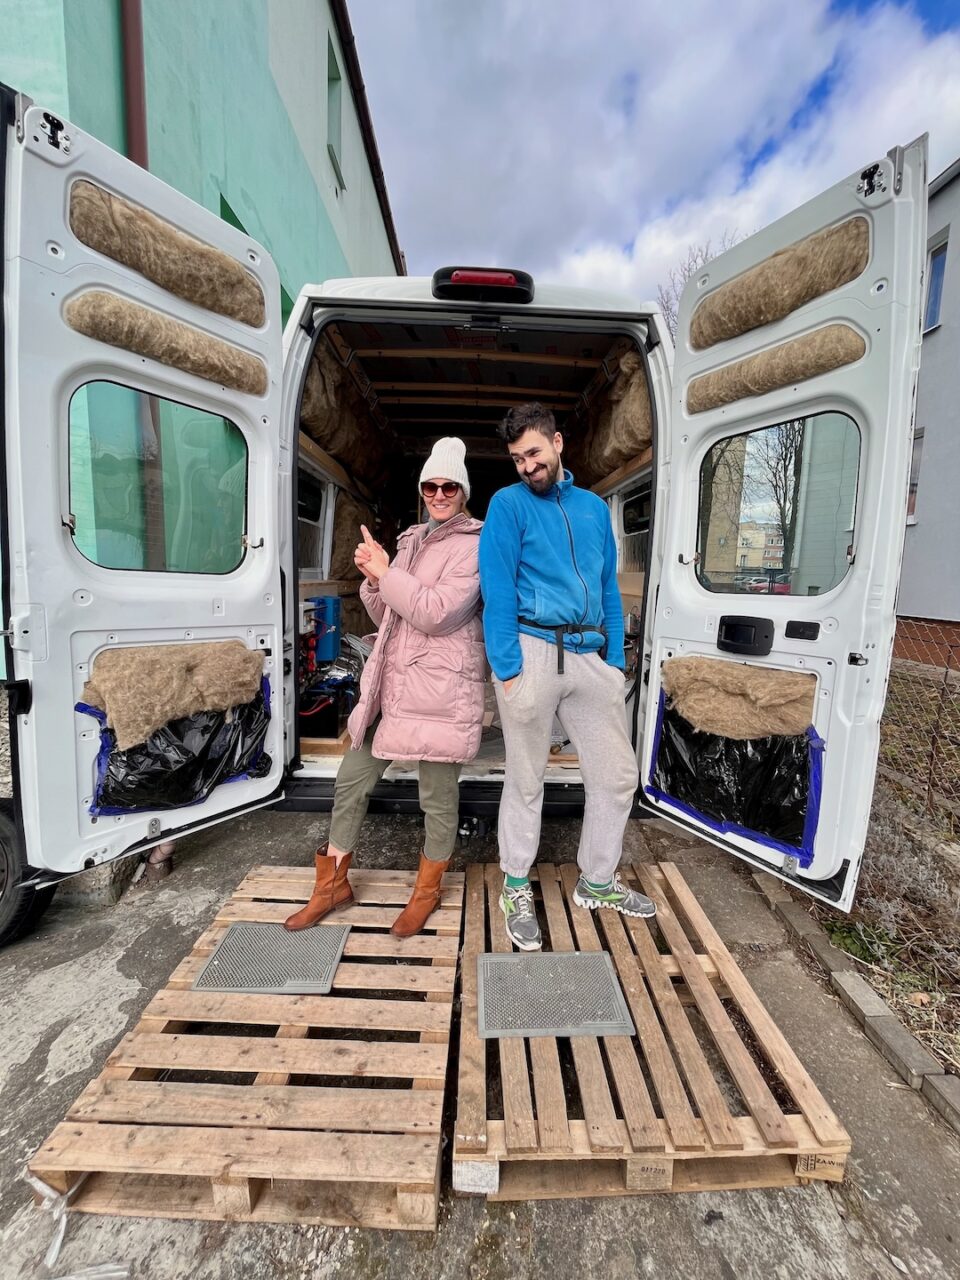
12. Get Help When You Need It
You don’t have to do everything alone.
Having someone help – even just for parts of the build – makes a big difference.
Maybe someone’s good with tools, someone else with sewing or finishing details. That kind of support speeds things up and often leads to better results.
And beyond that, building together just makes the whole experience more meaningful.
What’s your next step in the van conversion journey?
🔧 Build essentials → My practical tips for avoiding common mistakes
❓ Got questions? → Everything I wish I’d known before starting
🎒 Van life ready? → Real-world tips from the road
What aspect of van building excites (or scares) you most?
Final Thoughts on Your Campervan Build
Building your own campervan takes time, patience, and a lot of small decisions along the way.
But the freedom it gives you in return is hard to describe – you really feel it once you’re out there, living in something you built yourself.
If you’re dreaming about your own home on wheels, it’s absolutely possible. It might feel overwhelming at the beginning, but step by step, things start to come together.
I hope this guide gave you a few ideas – and maybe a little bit of confidence to start.
And if you’re already somewhere in the middle of your build, I’d really love to hear how it’s going.
