

Planning a road trip in the USA? Renting a car is often the easiest way to explore the country, especially if you want to visit national parks, scenic drives, and places beyond the major cities.
While the rental process may be a little different from what you’re used to in Europe, it’s usually straightforward once you know what to expect. A few simple tips can help you avoid unnecessary stress, hidden fees, and costly mistakes.
In this guide, I’ll walk you through the entire process – from booking your rental car to returning it at the end of your trip.
I’ll also share practical tips and lessons I’ve learned from renting cars during my travels across the western United States.
Planning Your USA Trip – Start Here
If you’re just getting started with planning your American adventure, these guides will help you understand the country, pick a region, and build an itinerary:
What to Know Before Renting a Car in the USA
Over the years, I’ve rented cars for everything from weekend getaways to multi-week road trips. Along the way, I’ve learned what matters most when choosing a rental company, understanding insurance options, and avoiding common mistakes.
If you’re renting a car in the USA for the first time, this guide will help you feel more confident before you pick up the keys.
Step 1: How to Book a Car in the USA
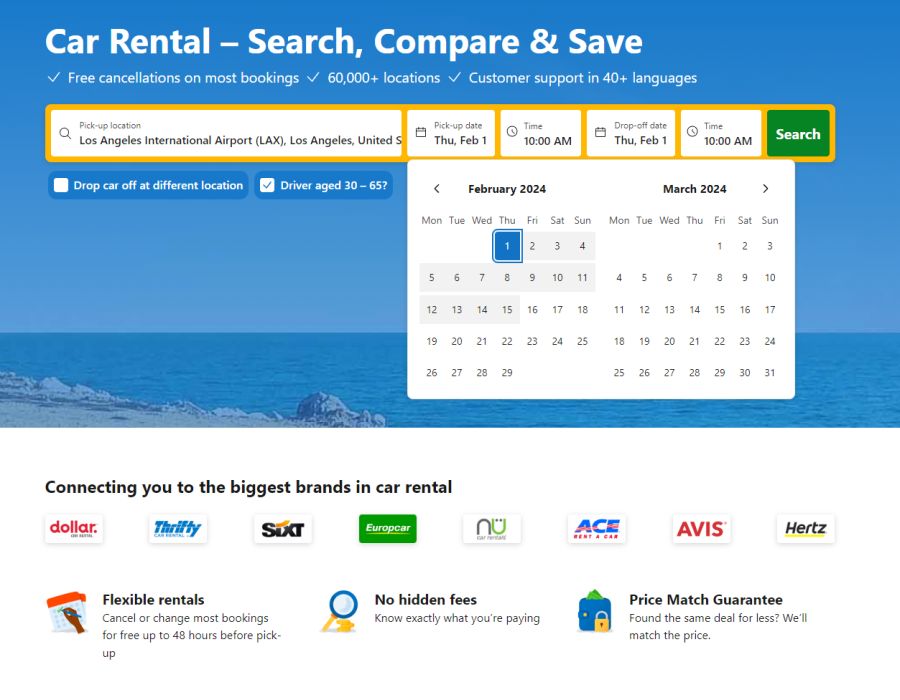
The easiest way to rent a car in the USA is to book it before your trip. You’ll usually get better prices, a wider selection of vehicles, and fewer surprises when you arrive.
I typically use Rentalcars because it allows me to compare offers from multiple rental companies in one place. When comparing options, pay attention not only to the price but also to the deposit requirements, cancellation policy, and insurance coverage.
If you’re traveling during peak season or picking up your car at a busy airport such as Los Angeles, Las Vegas, or Phoenix, it’s worth booking several weeks in advance.
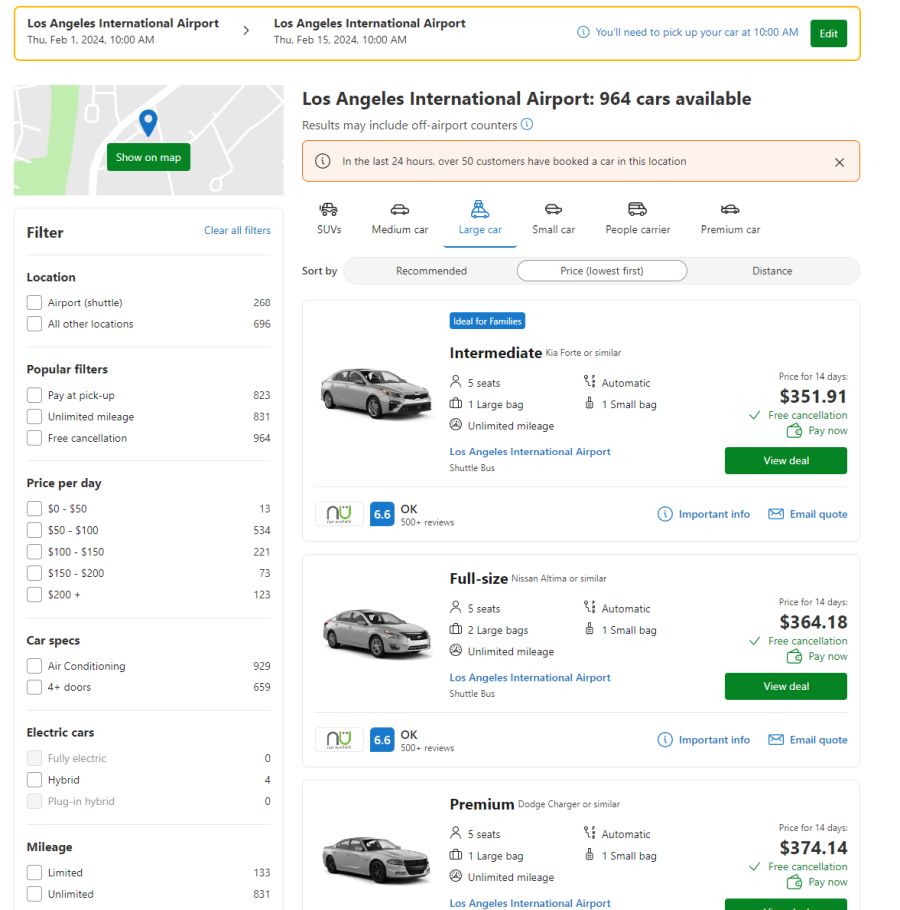
Step 2: Which Car Should You Choose?
For most trips in the USA, a sedan is the best all-around choice. It’s comfortable for long drives, has plenty of luggage space, and is usually only slightly more expensive than a compact car.
A sedan has worked well for me on everything from national park road trips to long days spent driving between destinations.
If you’re traveling with a larger group, carrying a lot of luggage, or planning to explore areas with unpaved roads, an SUV may be a better option. Just keep in mind that larger vehicles typically come with higher rental costs and lower fuel efficiency.
For most travelers, however, a sedan offers the best balance between comfort, space, and value.
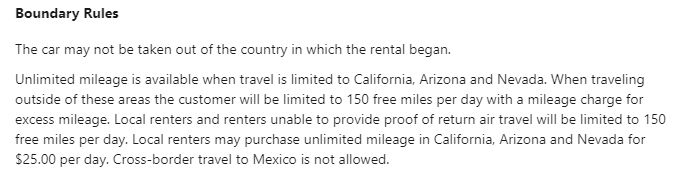
Step 3: What to Look for in the Rental Terms
Before confirming your reservation, take a few minutes to read the rental conditions carefully. This is where you’ll find important details that can affect both the cost of your rental and your overall experience.
Pay close attention to:
- cancellation policies,
- deposit requirements,
- interstate travel restrictions,
- additional driver fees,
- fuel policies,
- insurance coverage.
If one offer looks significantly cheaper than the others, there’s usually a reason. Extra fees, stricter conditions, or limited coverage can quickly turn a bargain into an expensive mistake.
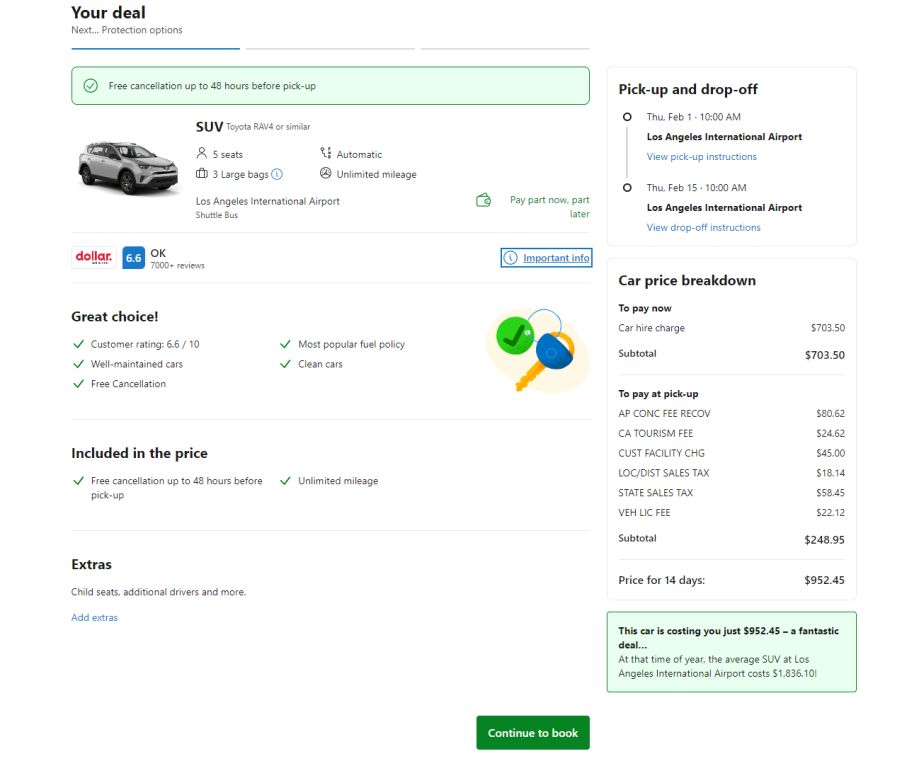
Step 4: How Much Does It Cost to Rent a Car in the USA?
The cost of renting a car in the USA depends on several factors, including the season, location, vehicle type, and length of the rental.
It’s also important to remember that the advertised price isn’t always the final price. Taxes, airport fees, and insurance can add a significant amount to the total cost.
Before booking, review the full price breakdown and make sure you understand exactly what’s included. Doing so can help you avoid unexpected charges when you pick up your vehicle.
Later in this guide, I’ll share the actual costs of one of my recent rentals so you can get a better idea of what to expect.
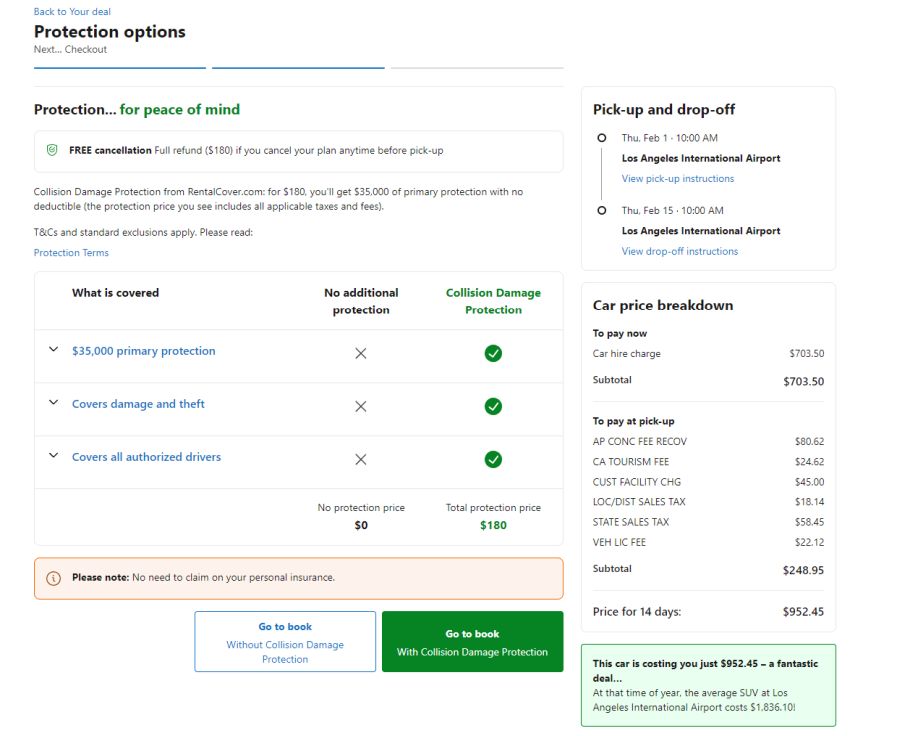
Step 5: Which Insurance Should You Choose?
Insurance is often the most confusing part of renting a car in the USA. During the booking process, you’ll come across several different coverage options, and it isn’t always clear what is included and what isn’t.
Before your trip, take the time to review your coverage carefully. Depending on your credit card, travel insurance policy, or rental package, you may already have some protection included.
If you’re unsure about your coverage, purchasing additional protection directly from the rental company can provide extra peace of mind. While it increases the overall cost, it may save you from significant expenses if something goes wrong during your trip.
Before signing the agreement, make sure you understand exactly what is covered in the event of an accident, theft, or damage to the vehicle.
Step 6: How to Get to the Rental Car Center After Landing
At most major airports in the USA, rental car facilities are located outside the main terminal area. After collecting your luggage, simply follow the signs for “Rental Cars” or “Car Rental.”
At airports such as Los Angeles, Las Vegas, and Phoenix, you’ll typically take a free shuttle bus to the rental car center. These shuttles run frequently and are usually easy to find.
During holidays, weekends, and peak travel periods, wait times can be longer than expected. If you’re arriving at a busy airport, it’s worth allowing extra time for the pickup process.
How do you want to explore America?
🏞️ National Parks Adventure → 10 Amazing Things to Do in Yosemite – My personal tested hiking trails and photography spots
🌊 Pacific Coast Highway → 7-Day California Coast Itinerary – Every scenic stop and hidden beach I discovered
🌲 Pacific Northwest Explorer → 10-Day Oregon & Washington Guide – Waterfalls, forests, and coastal magic
🏜️ Southwest Desert Experience → Arizona Road Trip – From red rocks to slot canyons
What type of American adventure calls to you most?
Step 7: What Documents Do You Need?
To rent a car in the USA, you’ll typically need:
- a valid driver’s license,
- a passport,
- a credit card in the driver’s name,
- your reservation confirmation.
Many rental companies accept foreign driver’s licenses without requiring an International Driving Permit, but requirements can vary depending on the state and rental company. It’s always worth checking in advance.
When you pick up your vehicle, you’ll likely be offered additional insurance products and optional upgrades. Knowing what you need before arriving at the counter can help you avoid unnecessary expenses.
Step 8: How to Pick Up Your Rental Car
After signing the paperwork, you’ll either receive a specific parking space number or be directed to a section where you can choose a vehicle within your reserved category.
Before leaving the lot, take a few minutes to inspect the car carefully. Check the exterior for scratches, dents, or chipped windshields, and make sure the interior is in good condition.
I also recommend taking photos or a short video of the vehicle before driving away. Having a record of the car’s condition can be helpful if any questions arise when you return it.
It’s also worth checking the fuel level, lights, and navigation system before you hit the road.

Step 9: Leaving the Rental Lot
Before exiting the lot, an employee will usually verify your documents and confirm that you’re driving the correct vehicle.
This is your last opportunity to report any issues or damage you may have noticed. If something doesn’t seem right, it’s best to address it before leaving the rental facility.
Once you’ve passed through the exit gate, you’re ready to begin your trip.
Step 10: What to Know During Your Rental
Driving in the USA is generally straightforward, but there are a few differences that may surprise first-time visitors.
One of the most common is the ability to turn right at a red light after coming to a complete stop, unless a sign specifically prohibits it. You’ll also notice that speed limits are posted in miles per hour (mph), not kilometers.
If you’re traveling in states such as California, Florida, or Texas, check whether your route includes toll roads. Many tolls are collected electronically, and rental companies often charge additional administrative fees on top of the toll itself.
It’s also important to remember that any traffic violations incurred during your rental period will be forwarded to the rental company, which may charge both the fine and an additional processing fee.
Step 11: How to Return Your Car
Returning a rental car in the USA is usually a quick and simple process. Just follow the signs to the designated return area at the airport or rental location.
Before returning the vehicle, make sure to refill the gas tank if your rental agreement requires it. Rental companies often charge significantly higher fuel rates than local gas stations.
After inspecting the vehicle, an employee will provide a return receipt. Keep this confirmation for a few weeks after your trip in case any questions or additional charges arise later.
How Much Does It Cost to Rent a Car in the USA?
The cost of renting a car in the USA depends on several factors, including the season, location, vehicle type, and insurance coverage.
While the initial price may seem reasonable, it’s important to remember that taxes, airport fees, and insurance can significantly increase the final cost. That’s why it’s always worth reviewing the full price breakdown before confirming your reservation.
To give you a realistic idea of what to expect, here are the costs from one of my recent two-week rentals:
- Car rental: $703.50
- Taxes and fees: $248.95
- Insurance: $578.90
- Fuel (approximately 3,500 miles): $700
Total: $2,231.35
Of course, not every rental will cost this much. Shorter trips, smaller vehicles, and different destinations can reduce the overall expense considerably.
Can You Rent a Car in the USA for Less?
Absolutely. However, the cheapest option isn’t always the best value.
Low-cost rentals often come with stricter conditions, limited insurance coverage, high deposits, or additional fees that only become apparent during pickup.
If you’re looking to save money, consider these tips:
- Book your rental car well in advance.
- Compare offers from multiple companies.
- Avoid peak travel periods whenever possible.
- Review the insurance coverage carefully.
- Read the rental terms before booking.
In my experience, paying a little more for a reputable rental company is often worth it for the added convenience and peace of mind.
Travel lighter, even before you leave.
start with something simple.
Download The Minimum Plan – Slow Travel:
Final Thoughts on Renting a Car in the USA
Renting a car is one of the best ways to explore the United States. It gives you the freedom to travel at your own pace, discover places beyond the major cities, and reach destinations that would be difficult to visit using public transportation.
During most of my trips around the American West, having a car wasn’t just convenient – it was essential. Some of my favorite places were the ones I found far from the usual tourist routes.
Although renting a car in the USA may seem overwhelming at first, the process is usually straightforward once you understand how it works. By paying attention to rental terms, insurance coverage, and additional fees, you can avoid common mistakes and enjoy a stress-free trip.
I hope this guide helps you feel more confident when planning your journey. Sometimes the best parts of a trip happen between destinations – and having your own car gives you the freedom to discover them.
Ready to start planning your American adventure?
Here are a few guides I think you’ll love next – all tested, personal, and full of insider tips:
- Hawaii Travel Guide – My favorite beaches, volcanoes, and island-hopping tips.
- Hidden Gems in Oregon – Budget-friendly spots most tourists miss
- Best Things to Do in Los Angeles – My curated mix of iconic sights and hidden corners
- Renting a Car in the USA – Insurance, deposits, road rules (all explained simply).
Pin it for later
This article contains affiliate links. If you make a booking through these links, I may earn a commission, supporting this blog. Rest assured, my recommendations are based on honest assessments, and using these links doesn't affect prices for you. Thank you for your support!