

Do you want to learn how to make professional photos? You’ve landed in the perfect spot! Master the fundamentals of photography to elevate your skills. Here are 10 tried-and-true methods to enhance the quality of your photos.
Whether you’re using a smartphone, a basic point-and-shoot camera, or an advanced camera with interchangeable lenses, these tips are applicable to you.
With these techniques, you’ll achieve the effects you’ve always desired. Get prepared for impressive results and enjoyable moments as you dive in!
Table of Contents
1. Capture a Sunset or Sunrise with Reflections
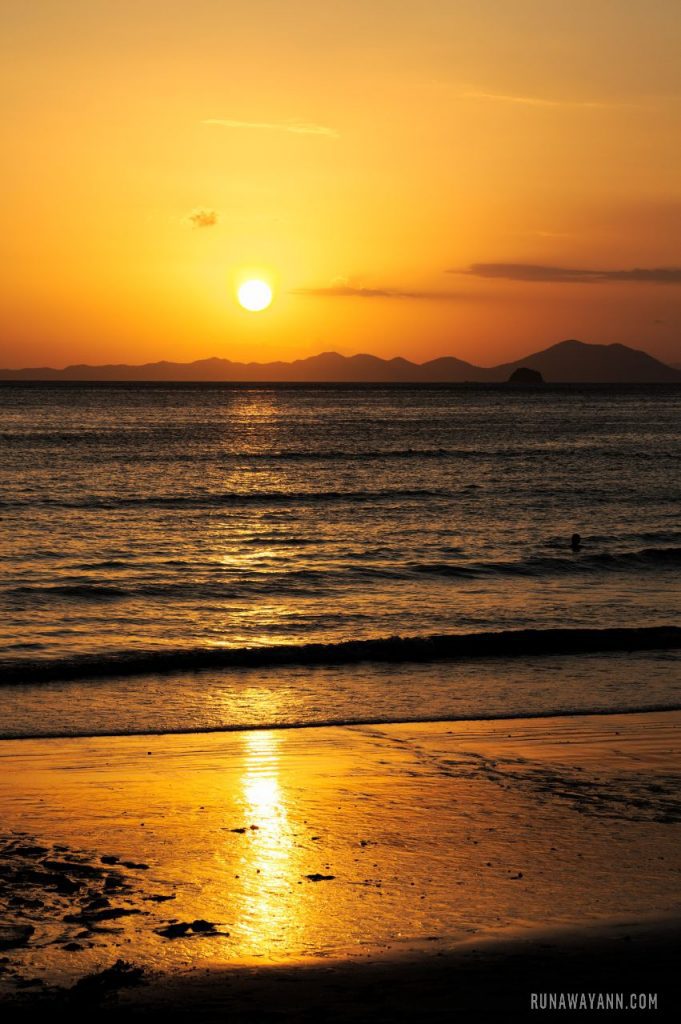
Images of the sun sinking below the horizon hold an undeniable allure and evoke memories vividly. However, the intense light often leads to overexposed or excessively dark photos with glaring spots.
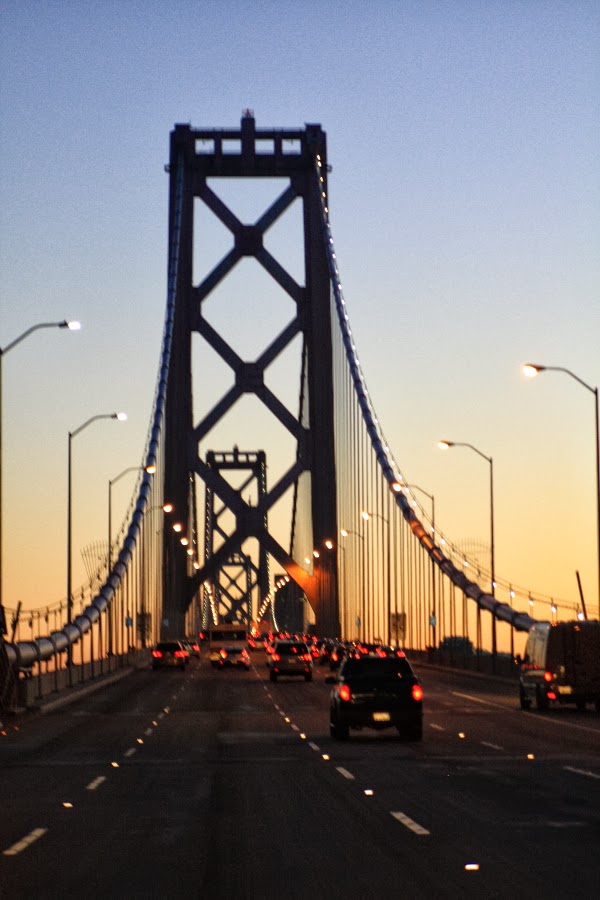
To add variety to such shots, consider capturing not only the sun and sky but also the light’s reflection on surfaces below. Water reflections are particularly popular, whether in the sea, ocean, lake, or the damp sands of a receding tide on the beach.
Experiment with perspectives; sometimes, crouching down can yield a more captivating reflection, or try shooting vertically. In addition to water reflections, utilize glass buildings, tiled surfaces, wet pavements, or cobblestones.
An inventive technique involves pouring water on pavement to create artificial puddles, offering a brilliant opportunity to capture the sun’s reflection.
2. How to Make Professional Photos?Utilize the Golden Hour
You’re likely familiar with the concept of the golden hour in photography. Simply put, the period just after sunrise and before sunset offers the most favorable lighting conditions for capturing photos. This isn’t limited to sun-centric shots; it applies to all types of photography.
During this time, light falls more parallel to the ground, creating captivating shadows that add depth to objects in your photos. Contrastingly, the harsh midday sun can result in unflattering shadows, such as those resembling a mustache under the nose in portraits. The same portrait taken during the golden hour would yield much better results.
It’s worth noting that the golden hour doesn’t necessarily last an hour; it’s more of a general guideline. Typically, you can expect the best lighting conditions up to two hours after sunrise and two hours before sunset.
Below are two photos of the Grand Canyon. While both are spectacular, take a moment to appreciate the intriguing shadows cast by the sun during the golden hour!


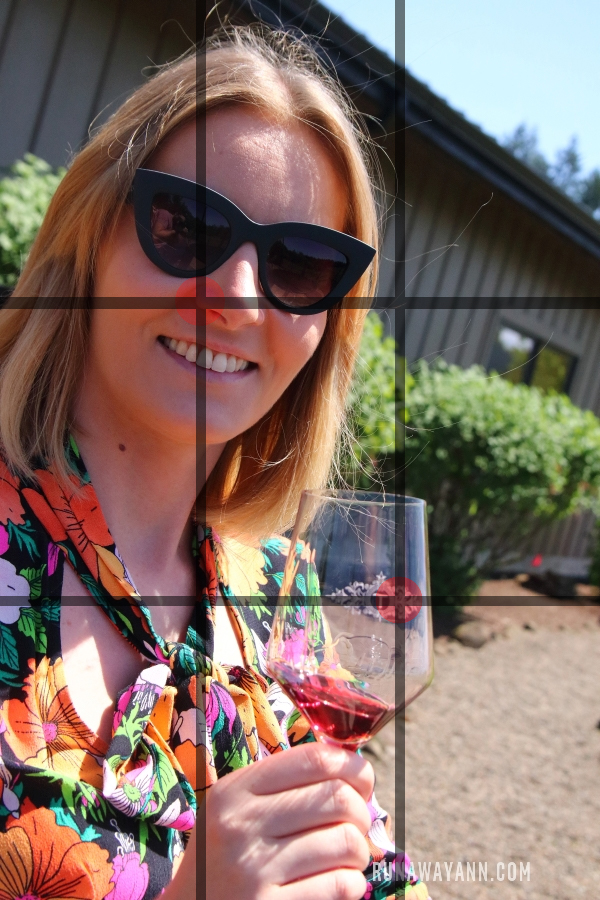
3. How to Make Professional Photos? Achieve Perfect Composition
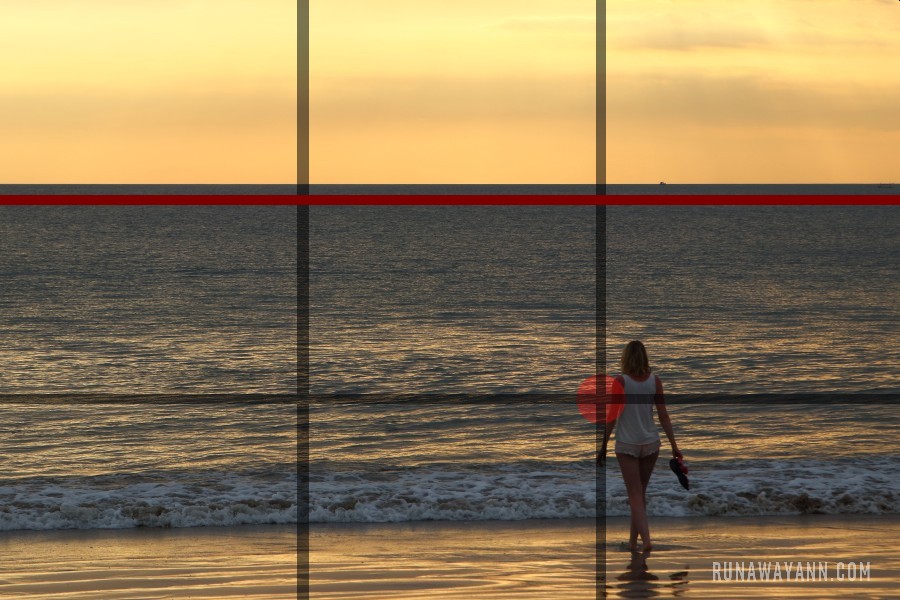
Many beginners tend to place the most crucial elements of their photos right in the center. However, it often leads to more captivating photos when the subject or focal point is positioned strategically at what we call the ‘strong points’ of the image.
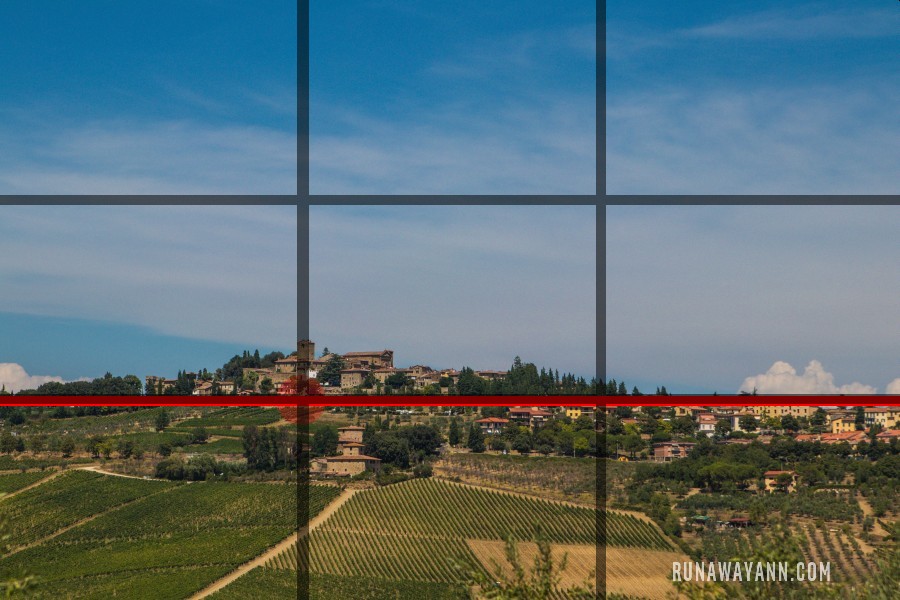
By dividing the image into nine equal parts, similar to the grid in tic-tac-toe, the intersections of these lines reveal the strong points of the photo. It’s these points that draw your eyes, whether it’s a portrait subject or a distant villa amidst the Tuscan landscape.
Conversely, when capturing horizon lines or buildings, utilizing one of these strong lines enhances the composition. Along this line, you can position the key elements of your photo.
If there are multiple significant elements forming the subject, try placing them along a combination of strong points or lines. Here are some examples of strong points and lines for reference

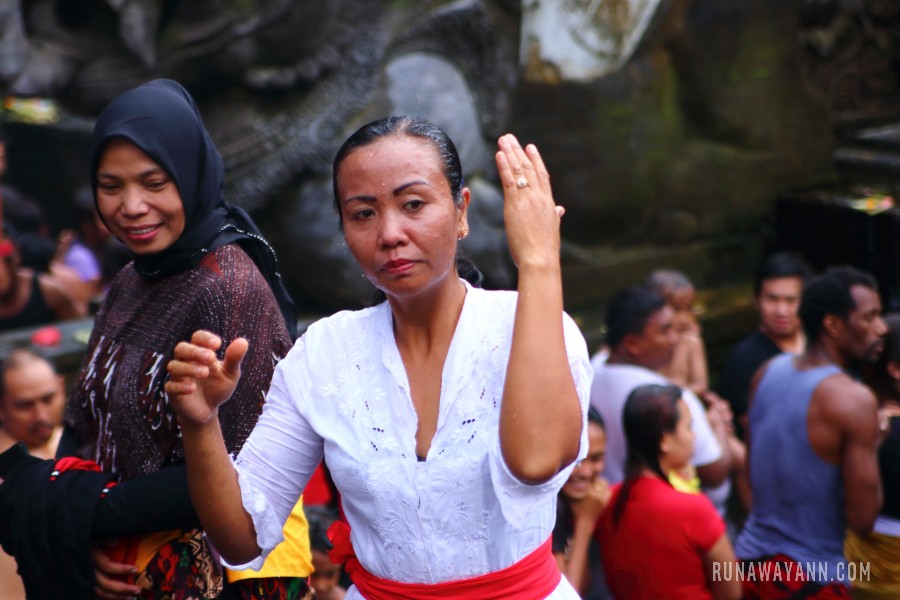
4. Capture Children and Animals from their Perspective
When photographing children and animals, it’s important to consider their perspective.
Typically, when capturing images of adults, we stand in front of them, raising the camera or smartphone to take the shot. However, employing this same technique with children may not yield the desired results; the resulting photo may appear like a bird’s eye view.
Instead, try crouching down or, when feasible, even lying on the ground (such as at the beach) to capture photos of your children from their eye level. This shift in perspective can lead to spectacular effects in your photos.
The same principle applies when photographing animals or other objects that are below eye level.
Below are two photos taken in the same location with identical camera settings. The only difference is the perspective: one is taken from above, while the other is captured from the cat’s viewpoint. Can you spot the difference?


5. How to Make Professional Photos? Mind Diffused Light
While we’ve highlighted the benefits of the golden hour in our second point, waiting for optimal conditions isn’t always feasible. A simple technique to improve photos in harsh sunlight is to diffuse it.
It may sound daunting, but it’s straightforward in practice. For instance, on a beach, a wide-brimmed hat can soften the sunlight. Similarly, standing in the shadow of a tree or vegetation can achieve a similar effect.
Indoors, when dealing with strong light from windows, using a white, translucent curtain can create beautifully diffused light for your photos. Additionally, hanging a sail above a patio or terrace can effectively disperse sunlight, providing ideal lighting conditions.
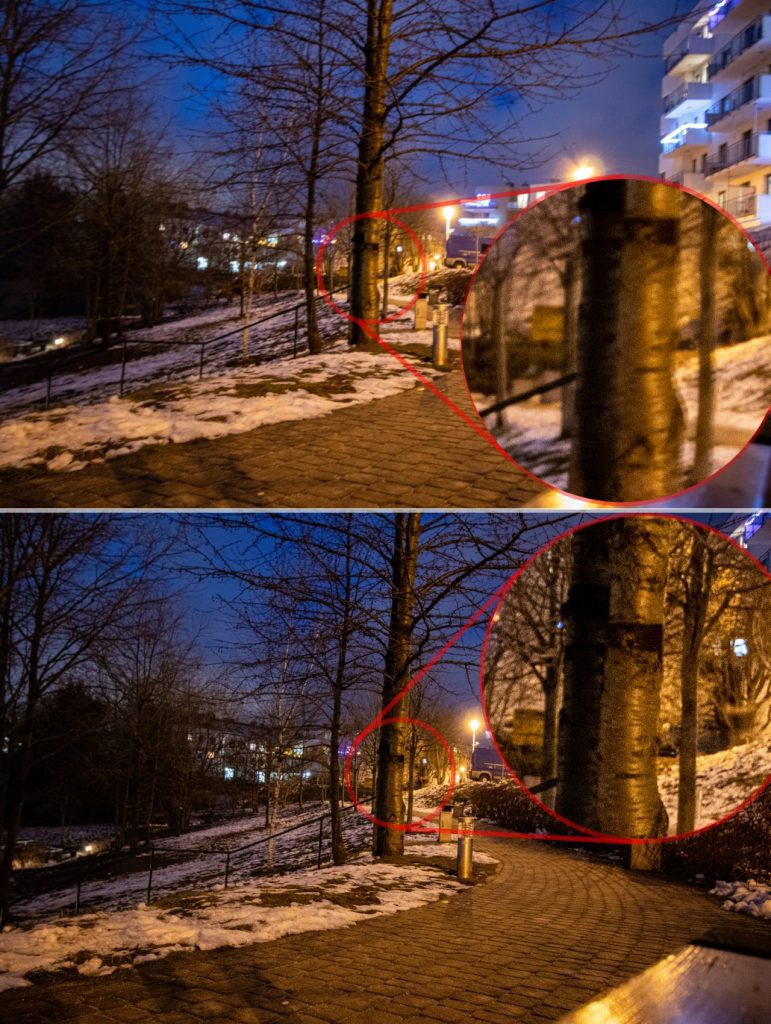
6. Take Night Photos With a Tripod
Nighttime photography or capturing scenes in low light conditions typically necessitates the use of a tripod. We strongly recommend investing in even a small, portable tripod as it significantly eases the task and yields noticeable improvements in results.
However, there are instances when an interesting shot presents itself, but a tripod is unavailable for various reasons. In such cases, improvisation becomes key.
Look for stable surfaces like walls, tables, chairs, stones, boxes, or backpacks where you can place the camera securely. If the camera isn’t level, utilize the camera strap, lens cap, or any available items to adjust and stabilize it to your desired frame.
Next, set the camera to night mode or, if feasible, opt for a long exposure. Another handy technique is to activate the camera’s timer function. By setting a short delay, such as 3 seconds, from pressing the shutter button to capturing the photo, you allow the camera to stabilize after your touch, ensuring a sharper image.
Below are two identical photos for comparison – the first taken without a timer, and the second with a delayed trigger. Mastering these techniques will earn you envy-worthy night photos!
7. How to Make Professional Photos? Mind the Background ‘Masters’
The internet abounds with photos where the background ‘masters‘ steal the spotlight. While they may evoke a chuckle, we certainly don’t want our perfect vacation snapshot marred by a stray garbage can or brightly dressed passersby drawing attention away from us and the stunning landscape.
When snapping a photo, it’s crucial to not only ensure the main subject looks impeccable but also to scan for any background distractions. If you encounter an unruly ‘master‘ of the background, the simplest solution is often just to wait a moment. Usually, the scene clears up, offering a better shot.
Moreover, people tend to move away upon realizing you’re taking a photo (a DSLR camera and tripod can be particularly handy here; we recently experienced this phenomenon while photographing a Christmas tree in a bustling square, where people instinctively avoided our setup).
If the background ‘masters‘ prove stubborn (garbage cans rarely yield to social cues), another tactic is to line up—the photographer, the subject, and the pesky background element. This way, the inconvenient elements are obscured by the subject. By standing closer to the camera, the perspective naturally diminishes the distracting background, enabling even slender individuals to achieve stunning results 😉
In the comparison below, a simple step to the left magically transported us to an empty forest!

8. How to Make Professional Photos? Utilize “Foot Zoom”
In photography, we distinguish between two types of zoom: optical, achieved by adjusting the focal length of the lens, and digital, which mimics the process of enlarging a photo on a phone—essentially zooming in on a digital image. It’s best to avoid digital zoom altogether. Instead, capture your photo without digital zoom and enlarge it later on your computer.
While optical zoom is acceptable in terms of photo quality, it can inadvertently encourage laziness in photographers. Rather than actively seeking out a good frame, photographers may opt to stand in place and adjust the zoom accordingly. To combat this, we advocate for the use of the third type of zoom: “foot zoom.”
Though not a professional term, the concept is simple. Instead of relying on the camera’s zoom function, take a few steps closer or further away from the subject. Consider crouching or ascending a hill to find a vantage point that yields an interesting shot.
“Foot zoom” proves especially useful when photographing with a smartphone, as they typically lack optical zoom and rely solely on digital zoom—which, as mentioned earlier, is best avoided.
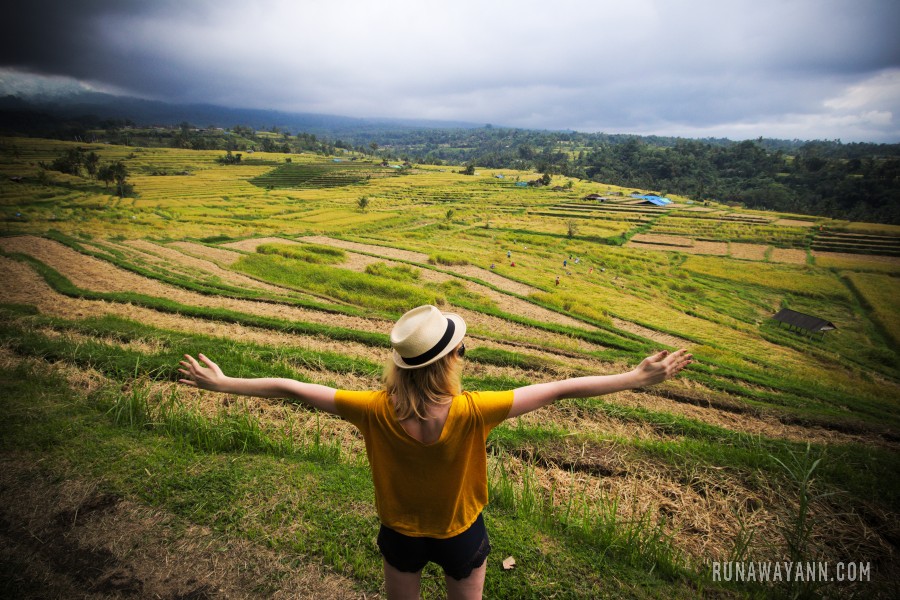
9. Zoom for Portraits, Wide Angle for Landscapes
Another valuable tip concerns the use of digital zoom mentioned earlier—portraits should be captured with greater zoom (longer focal length), while landscapes benefit from the smallest zoom (shorter focal length). There are two primary reasons for this approach.
The first reason is straightforward: portraits focus on details, such as a person’s face, thus requiring zooming in for optimal composition. Conversely, landscapes aim to showcase vastness and space, necessitating a wider perspective to capture the expansive scenery effectively.
The second reason is less apparent but equally significant: altering the focal length impacts perspective. A larger zoom results in what’s known as perspective flattening, enhancing facial features in portraits. In contrast, wide-angle lenses can distort images, stretching facial features, such as the nose.
Moreover, longer focal lengths can create a pleasing background blur, drawing attention to the subject—the person posing for the portrait.
Wide-angle lenses with low zoom settings make it easier to achieve overall focus in landscape photography. Since most elements in the scene are distant, any distortions caused by the lens are typically less noticeable and don’t detract from the composition.
10. Minimize Photos Against the Sun, Unless Necessary
Let’s revisit the topic of the sun. When capturing photographs, it’s generally preferable to have the sun behind us. This positioning ensures even illumination of the scene: the sky appears blue, hills are green, and buildings are evenly lit.
However, it’s not always feasible to position ourselves with the sun directly behind us; sometimes it may be off to the side.
When faced with photographing objects against the sun, we must acknowledge that achieving even lighting can be challenging (though there are more advanced methods, which we’ll discuss in a subsequent post).
In such cases, it’s beneficial to take multiple shots, focusing on different elements—such as the building or the sky. Sometimes, with experimentation, optimal lighting can be achieved.
If achieving balanced lighting proves elusive, consider converting the photo to black and white and adjusting the contrast slightly. These editing operations are available in most photo editing programs, including those on smartphones.
This adjustment can transform the photo’s character, turning sharp lighting from a flaw into a distinctive feature that enhances visual interest.

How to Make Professional Photos? Conclusion
Now you’ve learned how to make professional photos. The above 10 tips will instantly enhance the quality of your photos, making them truly memorable.
However, it’s important to remember that sometimes it’s worth breaking these rules. We encourage experimentation, but we also advise mastering the basics before delving into more advanced techniques.
Embrace creative freedom, experiment, and you’ll unlock the magic hidden within each photograph!
This is a great post! I gotta send this to my husband who takes all my travel photos haha. I love golden hour photos! They are my fav. Thanks for sharing x
http://www.lynnmumbingmejia.com
My hustband is also my private vacation photographer 😉 Glad that you’ve enjoyed this post!